Astrophotography Digest 1: Gear
I’ve been getting a few queries as to how I take my astronomy pictures and it’s often to people’s surprise that all of these photos can be taken by a regular digital camera (DSLR or mirrorless). In light of this, I’ve decided to write a quick-start guide on how I personally do astrophotography. Considering I am quite an amateur at this, with limited gear, my hope is that this would be a good starting resource to at least encourage some to pursue this hobby. I do, however, assume a bit of knowledge on photography in general (i.e. understanding terms such as shutter speed and focal length) – I think this is a fair prerequisite considering astrophotography is among the more technical subjects of photography.
This will likely come in 3-4 parts, since it seems I ramble on and it’s good to compartmentalize ideas for easy browsing. On to the digest.
Gear
I personally have a Sony A7ii, though even this camera is more than necessary for getting good astro photos. In many ways, older DSLR’s such as the Canon EOS 6D would actually serve you better (particularly because they are better supported by remote astro capture software). The point I’m getting at here is you don’t actually need the best gear – any decent camera from the last 10 years would work perfectly fine.
Full-Frame vs Crop Sensor
Perhaps the single most important factor with regards to camera in my opinion is the sensor size. Full-frame and crop sensors (such as APS-C) offer different advantages with regards to astrophotography. Full-frame sensors are physically larger and thus individual pixels are able to gather more light leading to better low-light performance. Smaller crop sensors, on the other hand, offer a crop factor on focal length, meaning that a picture taken with the same lens would look more zoomed-in on a crop sensor compared to a full-frame. For example, a 400mm lens would produce a ~600mm equivalent image on a crop sensor – very useful for capturing smaller night sky subjects. This also has the byproduct of making crop sensor systems cheaper by a significant margin – lenses can be made smaller which has the extra effect of allowing the use of less robust tripods.
Overall, I would suggest to go for the crop sensor system because the cost difference is quite substantial. The only issue is the overall photography market seems to be moving towards full-frame (Sony is increasingly neglecting producing APS-C lenses), but this is not even a big issue since full-frame lenses are entirely usable on crop systems.
Lenses
With regards to lenses, there are really only two focal length ranges important to astrophotography – wide-angle (<35mm) and super-telephoto (>135mm). Wide-angle is used for capturing the night sky with landscape, perhaps getting the entire extent of the Milky Way, while super-telephoto is used for capturing deep-sky objects (nebulae, galaxies, star clusters). The standard, portrait, and short telephoto ranges are simply at an awkward length for astrophotography – they are too tight to capture the Milky Way, and too wide to capture any deep sky subjects. While this isn’t a strict rule – one can certainly (and is encouraged to) break rules – it’s best to try to learn the rules first on the usual night sky subjects.
As well, considering the night sky is a static subject, autofocus is entirely not required. In actuality, I personally prefer solely manual focus lenses over focus-by-wire for astrophotography since this allows for infinitely granular and immediately responsive adjustment. This opens up the chance to use vintage manual lenses (read: cheap), which is how I’m currently taking my photos. My current workhorse is a 400mm Bushnell lens, which I suspect was already mediocre at best already during its time.
The key things to look for in an astro lens is a wide aperture (since we’ll need to be gathering as much light as possible), minimal coma (star distortion near the edges), and minimal chromatic aberration (color shifting in high-contrast). These are things one looks for in a good lens in general anyway, but their importance is heighted in astro simply by the nature if trying to capture high contrast stars against a dark background. It should be noted, though, that the latter two are basically impossible to assess without actually trying the lens.
My suggestion for finding astro lenses is simply to find good deals on very old manual lenses on ebay or local classifieds (i.e. kijiji in Canada) and just prioritizing your target focal length and the widest aperture. I would suggest first to look for a telephoto lens of at least 400mm focal length. 400mm is just enough to start to satisfactorily resolve most Messier objects as well as the Moon, though jumping up to 600mm would help get some extra detail. These will in general be “birding” lenses (for taking pictures of birds, as expected) which seems to have been popular in the past. If you’re interested in capturing landscapes, by all means get a wide-angle lens, but I’ve found that processing landscape images to be more difficult since it involves trying to merge an exposure for the foreground and an exposure for the sky without making it look glued together. This is something I still have no idea how to do well. By comparison, processing deep sky images is surprisingly straightforward.
Tripods
Get one. A good one.
I’m not kidding. I’ve broken two tripods now – not the tripod’s fault, they were lightweight travel tripods and I was using equipment very much past their weight range. Seriously though, astrophotography requires ridiculously long exposure times (minutes long for a single exposure) so a good tripod is a must.
Star Trackers
All the equipment I’ve listed above all all things that are necessary for doing astrophotography. You can’t really take pictures without a camera and a lens, and you’re not really going to get far taking night exposures without a tripod. After this, a star tracker is the single best upgrade you can get to expand the quality of photos you take as well as your number of potential targets.
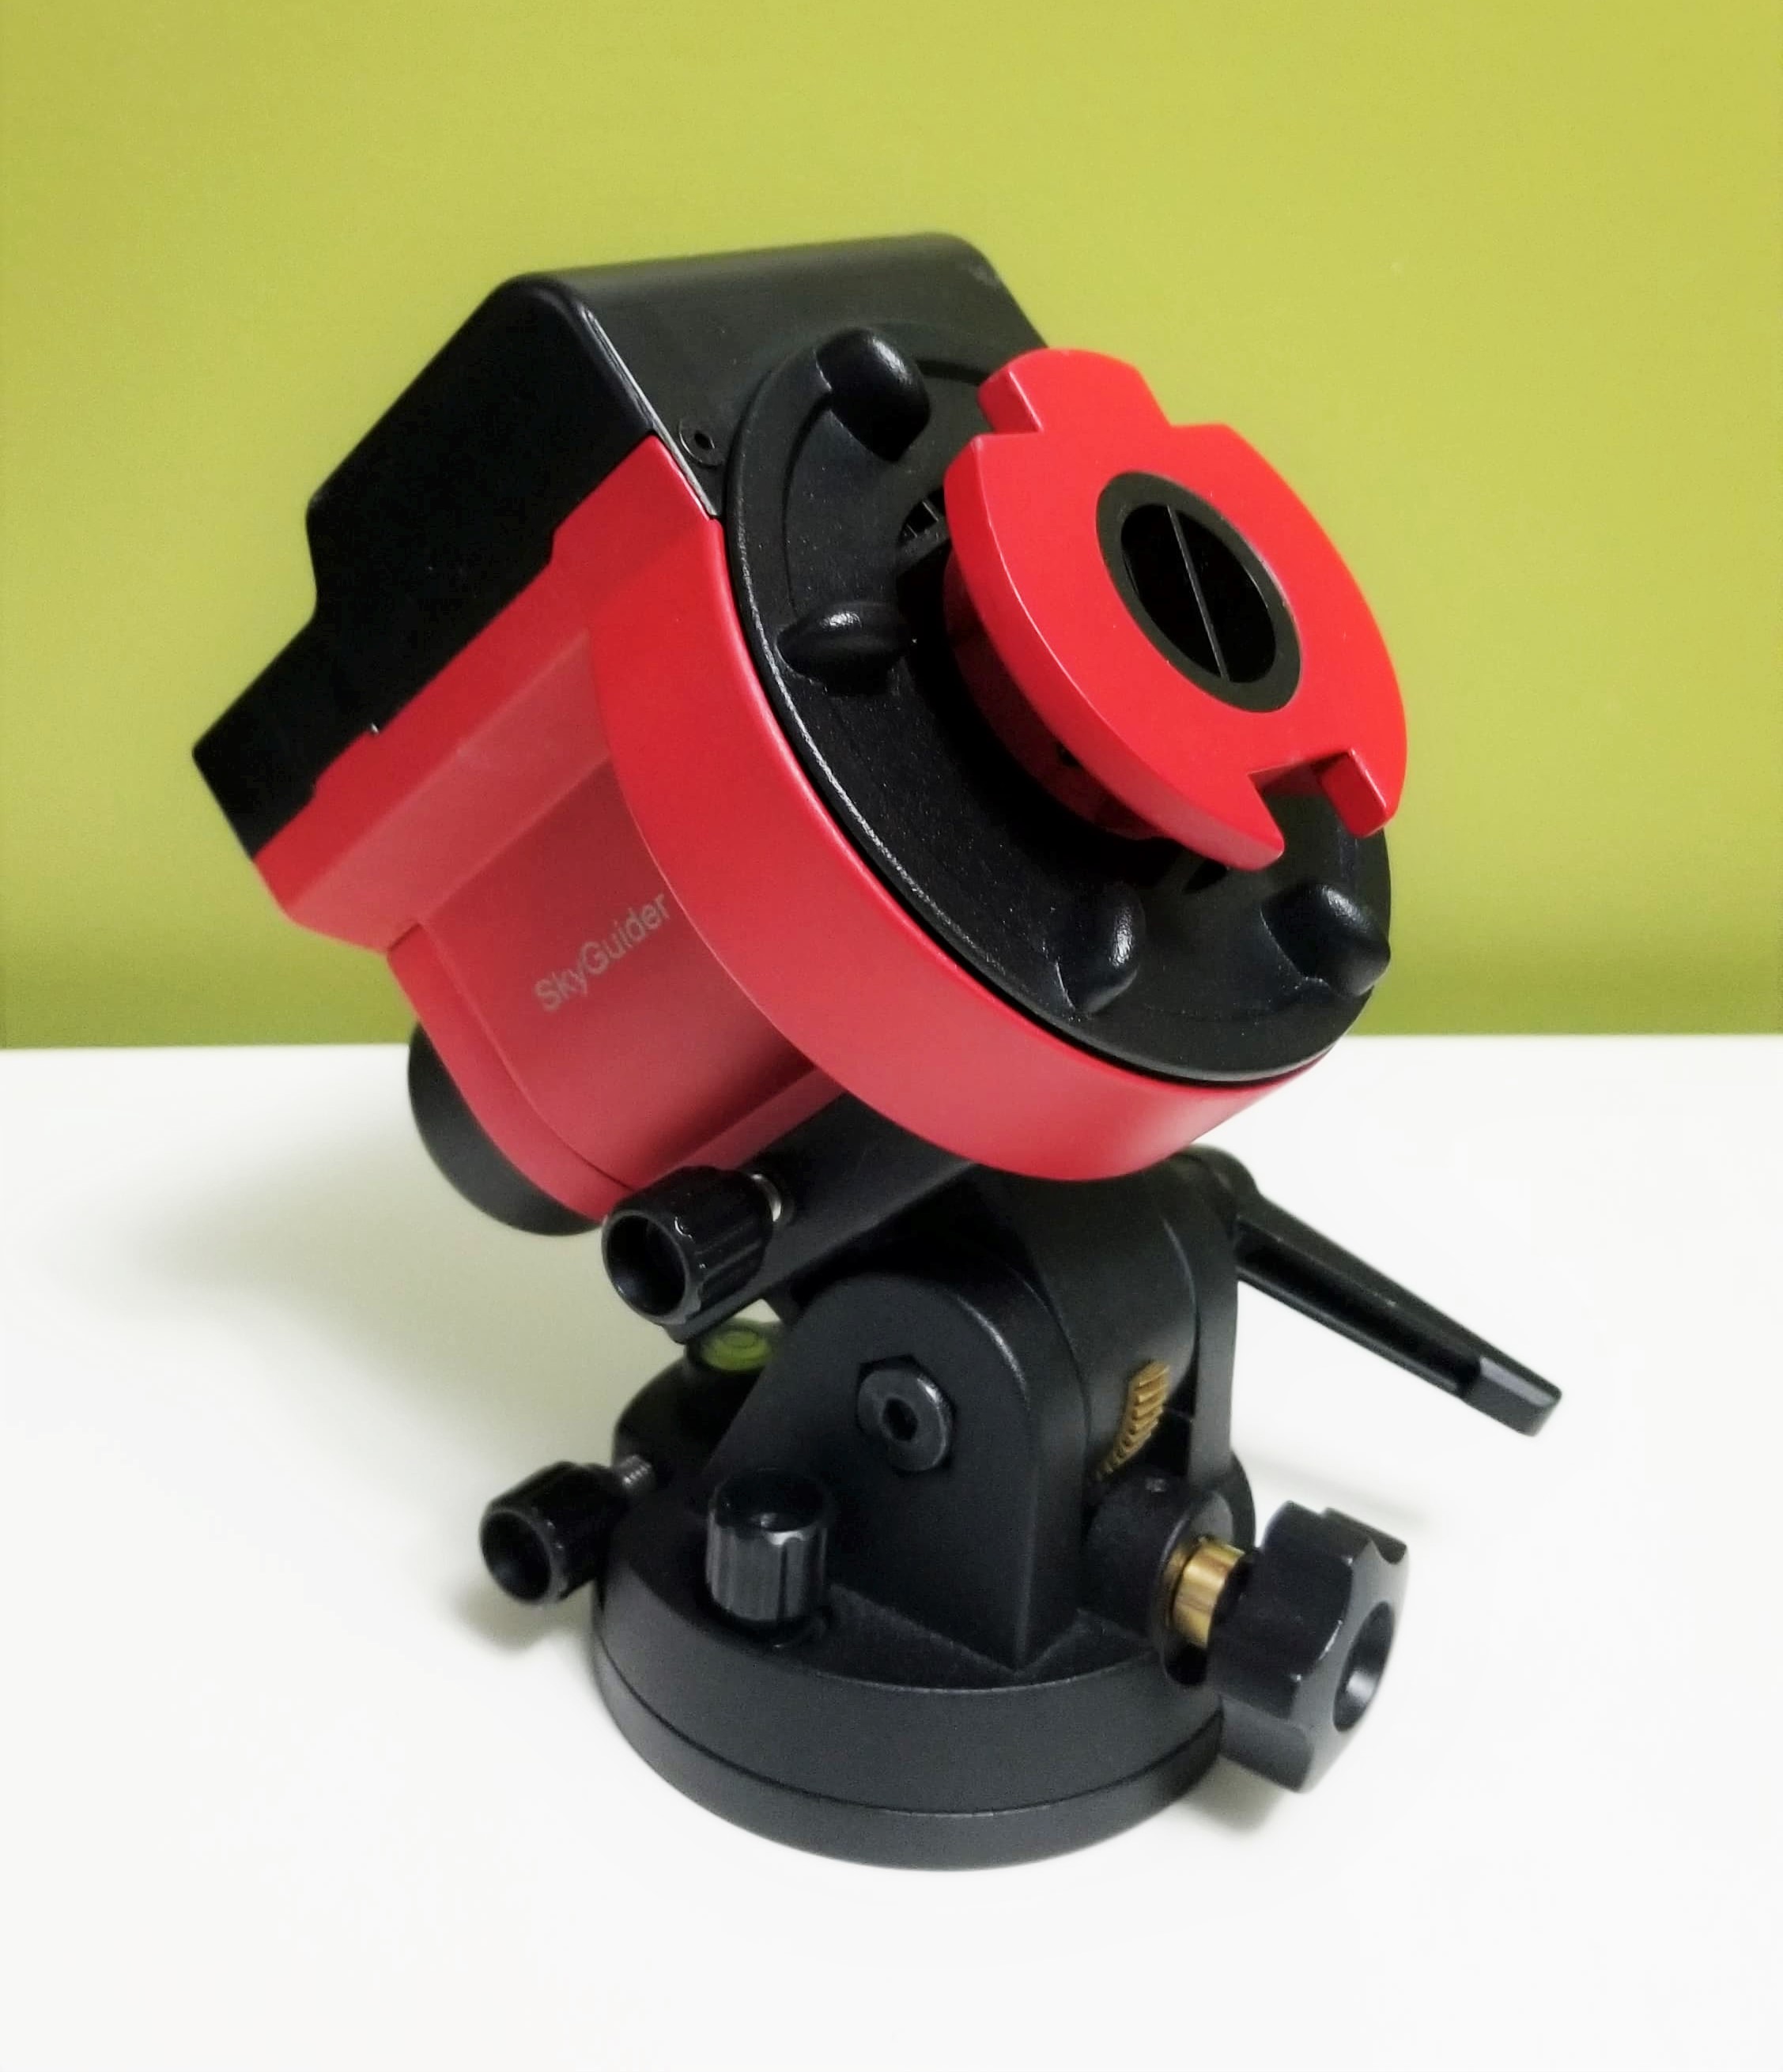
Figure 1: The iOptron SkyGuider.
What you’ll quickly find out when starting astrophotography is that your exposure time is limited by star trails caused by the rotation of the night sky. You may like to take longer exposures, but any exposure time past half a minute (shorter for longer focal lengths) will result in stars rendering as lines rather than nice points.
A star tracker is effectively a very slow motor that rotates a full 360 degrees in 24 hours. This means we can use it to rotate exactly against the Earth’s rotation, so that the sky is frozen static for any camera mounted on the star tracker. There is a range of star trackers available – the two entry level ones being the iOptron SkyGuider and the SkyWatcher Star Adventurer. From what I’ve heard, they basically function the same so just get whichever is cheaper or more readily available in your region. I personally have the SkyGuider and it works perfectly well for even the large telephoto lenses I use. Note that there are more expensive mounts that adjust both altitude and azimuth – for beginner astrophotography these are completely overkill and the single rotation axis of beginner star trackers basically get you 90%+ of the accuracy.
As a final note, I would highly suggest investing in a star tracker before getting any expensive lenses – the reason being is while lenses are useful for reducing distortion, a star tracker greatly increases exposure time, making it possible to hunt a wider range of subjects which I think makes astrophotography more fun.