Block Printing
I semi-recently got new block printing inks in the mail and finally got around to trying them out today. I had previously been using some water-based Speedball brand inks as they’re often suggested for beginners learning block printing, but I have to say that the new oil-based inks are actually a lot nicer to work with. I figured while doing a printing session today that I would document the process a bit and share some thoughts about it. Apologies in advance for the terrible photos, it is rather hard to take photos and do the printing at the same time while avoiding making a big mess with the ink.
I’m reusing a woodblock that I carved earlier this year (Figure 1); I’ll try to document how to actually carve a block the next time I do so. To be perfectly honest, so far I’ve been much enjoying the carving process over the printing process. Additionally, I prefer carving on wood rather than linoleum (shortened to lino) commonly suggested for beginners because it’s possible to squeeze a lot more small details on wood. Lino is softer than wood and is thus easier to cut, but this same softness is why it cannot hold as much small detail. The key to working with woodblocks is just having sharp enough tools and a sturdy enough table. The only significant difference I find with lino and wood that can’t be fixed with sharper tools is the anisotropy of wood. Lino is a generally homogeneous material so cuts in different directions tend to act in the same manner. Since blank woodblocks are often given with sidegrain, the wood fibres have one preferential direction for cutting. This means you just have to be a lot more careful carving wood, but the carving process is relaxing anyway and not something that should be rushed. I’ll try to remember to comment on this again whenever I get around to making a woodblock carving tutorial.
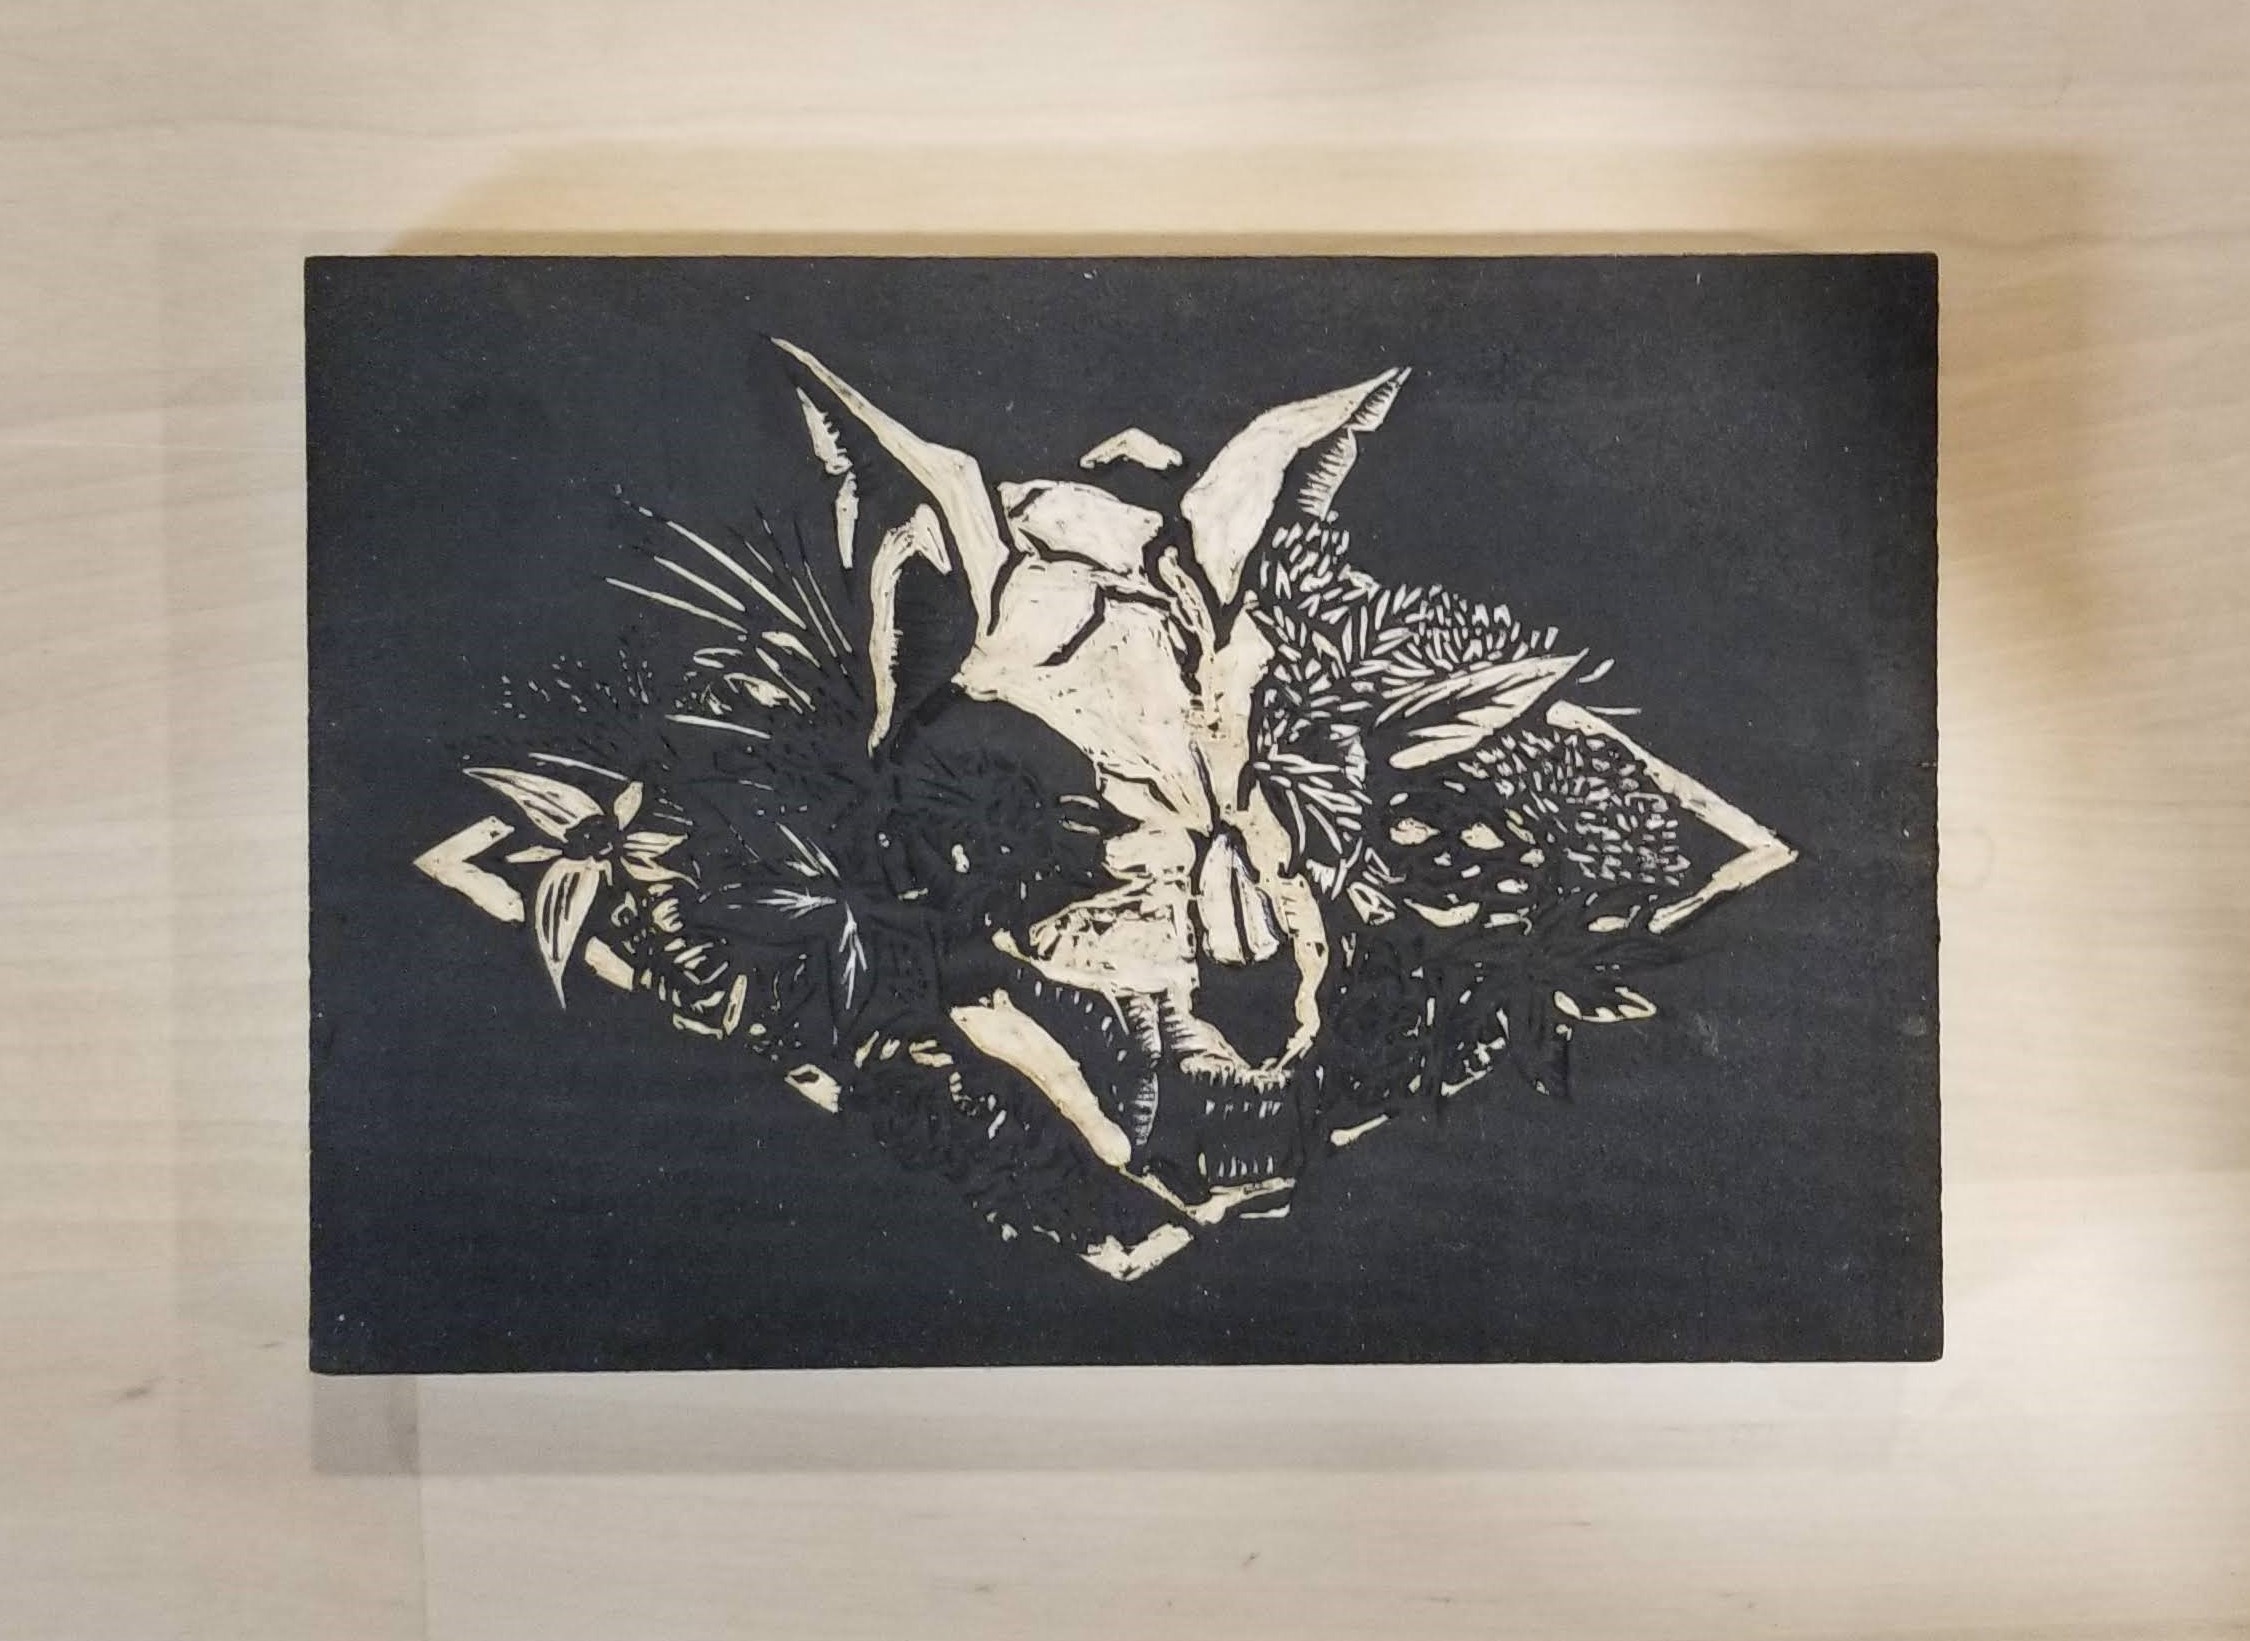
Figure 1: The woodblock I’m printing today. Design features a cat skull surrounded by some flowers.
Tools and Materials
Starting off, the required tools are shown on Figure 2. Going over these tools, we have:
- Baren: Used for pushing the paper on the block to make sure ink transfers fully. I use a bamboo baren here, but plastic kinds also exist. A commercial one isn’t necessary either, the back of a spoon works well enough, and so does just using your fingers. Fingers actually work better if your paper is too weak to rub with a baren. Alternatively, a printing press can be used but I don’t have one at the moment.
- Clothes Pins: Oil-based inks take significantly longer to dry than water-based inks, so these are needed to hang the finished prints for drying.
- Palette Knife: For working and softening the ink.
- Printmaking Paper: For, well, printing the design onto. I use Strathmore brand here but a lot of different brands exist. Just make sure the paper is thick enough since it does take a bit of mechanical abuse.
- Oil-Based Ink: The star of the show, at least today. I’m using Caligo safe-wash inks, which is oil-based but apparently can be washed with soap and water for easy cleanup (most other oil-based inks typically need other solvents such as mineral spirits to clean up).
- Soft Brayer: For spreading the ink and transferring it onto the block. I’ve only ever used a soft brayer so I can’t comment on the difference between a soft and a hard brayer.
- Old Rag: For cleaning up messes.
- Parchment Paper: For storing away extra ink.
- Flat Glass: A flat surface to work the ink on. This is just a sheet of glass from an old picture frame.
- Woodblock: The design you intent to print.
- Tub of Water: For wetting the paper prior to printing.
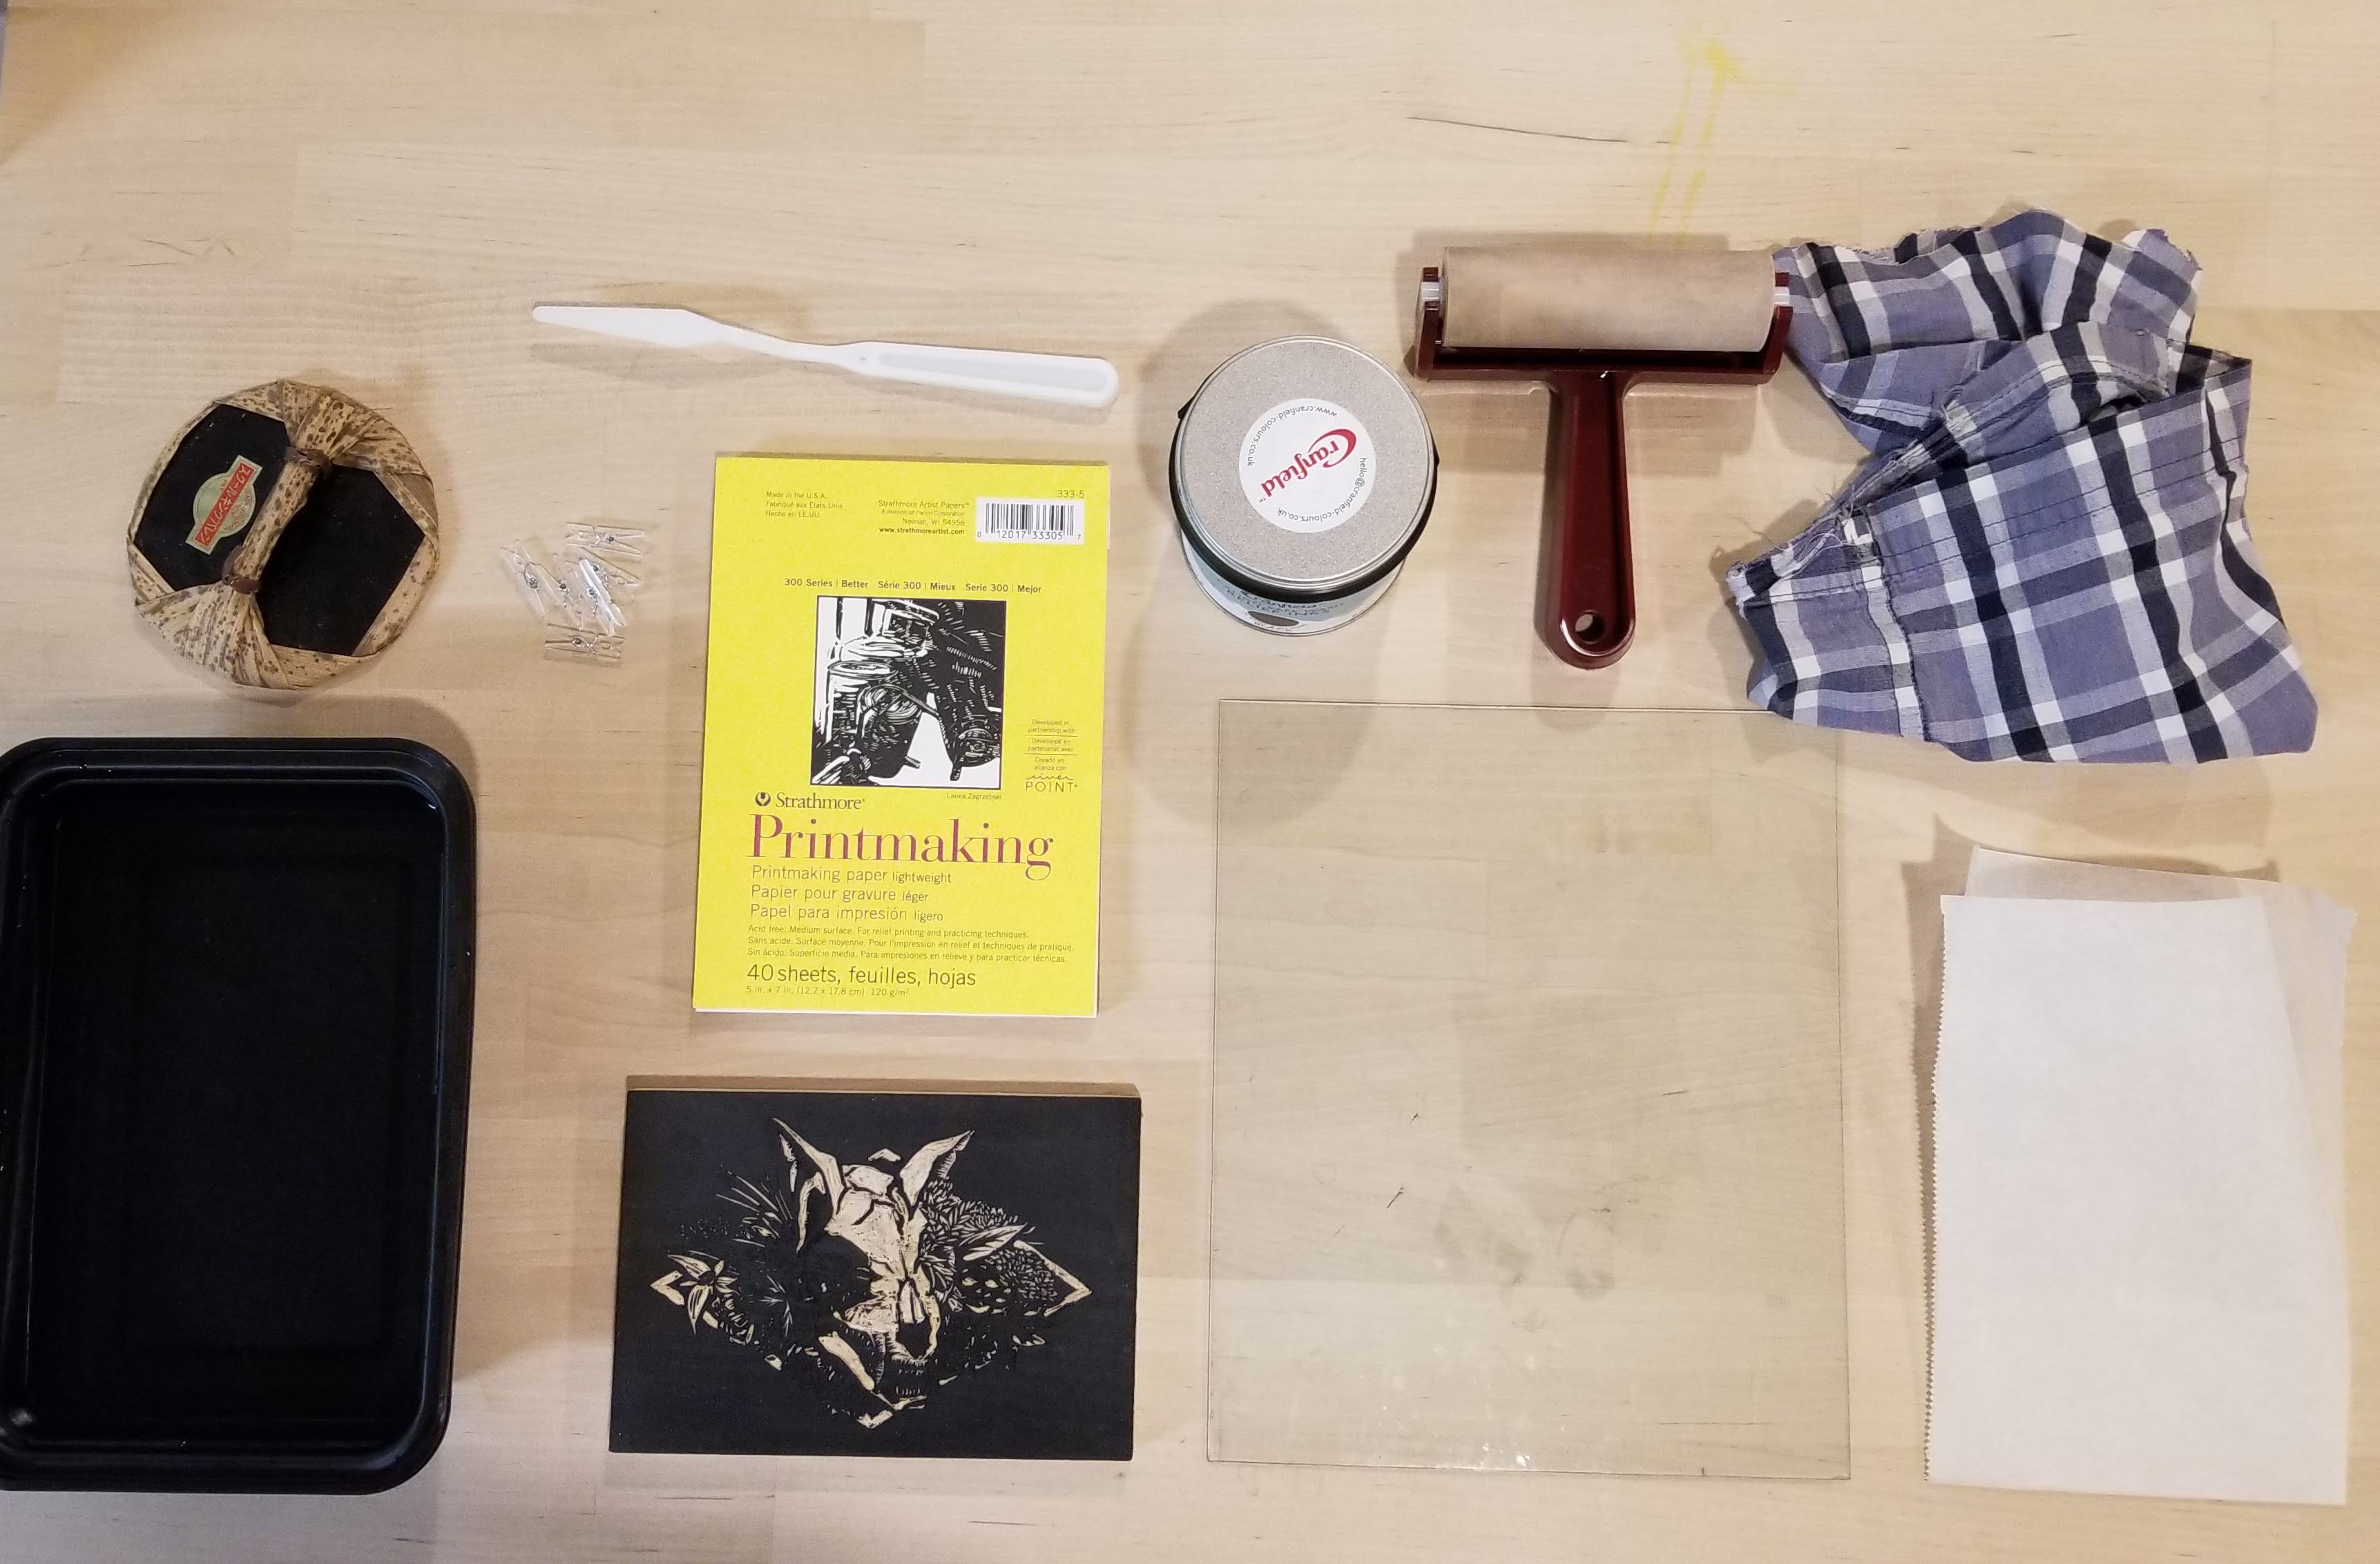
Figure 2: Tools and materials. Clockwise from top left: bamboo baren, clothes pins, palette knife, printmaking paper, oil-based ink, soft brayer, old rag, parchment paper, flat glass, woodblock, tub of water.
Process
The first step is to wet the paper (Figure 3). You don’t need to soak it for particularly long, just enough to get it damp. If it’s too wet, dry it with a paper towel before using. To be honest, I think soaking it in a tub of water is a bit much and leaves the paper too fragile, so next time I’m going to just use a spray bottle. The one issue with a spray bottle is that you need to make sure the entire paper is sprayed, since if it doesn’t soak throughout then dry parts of the paper would respond differently to wet parts.

Figure 3: Soaking the paper.
Next, grab some ink using the palette knife and spread it onto the glass sheet. Make sure that you don’t add too much ink - about a pea’s worth is enough (same as toothpaste). Adding too much ink would make it hard to get an even coat of ink later.
The flat sheet of glass effectively works as our palette, and we will use it to work the ink (Figure 4). Oil-based ink is generally less liquid than water-based inks, especially at lower temperatures, meaning that it has to be mechanically mixed a bit to soften it to a consistency that can be spread.
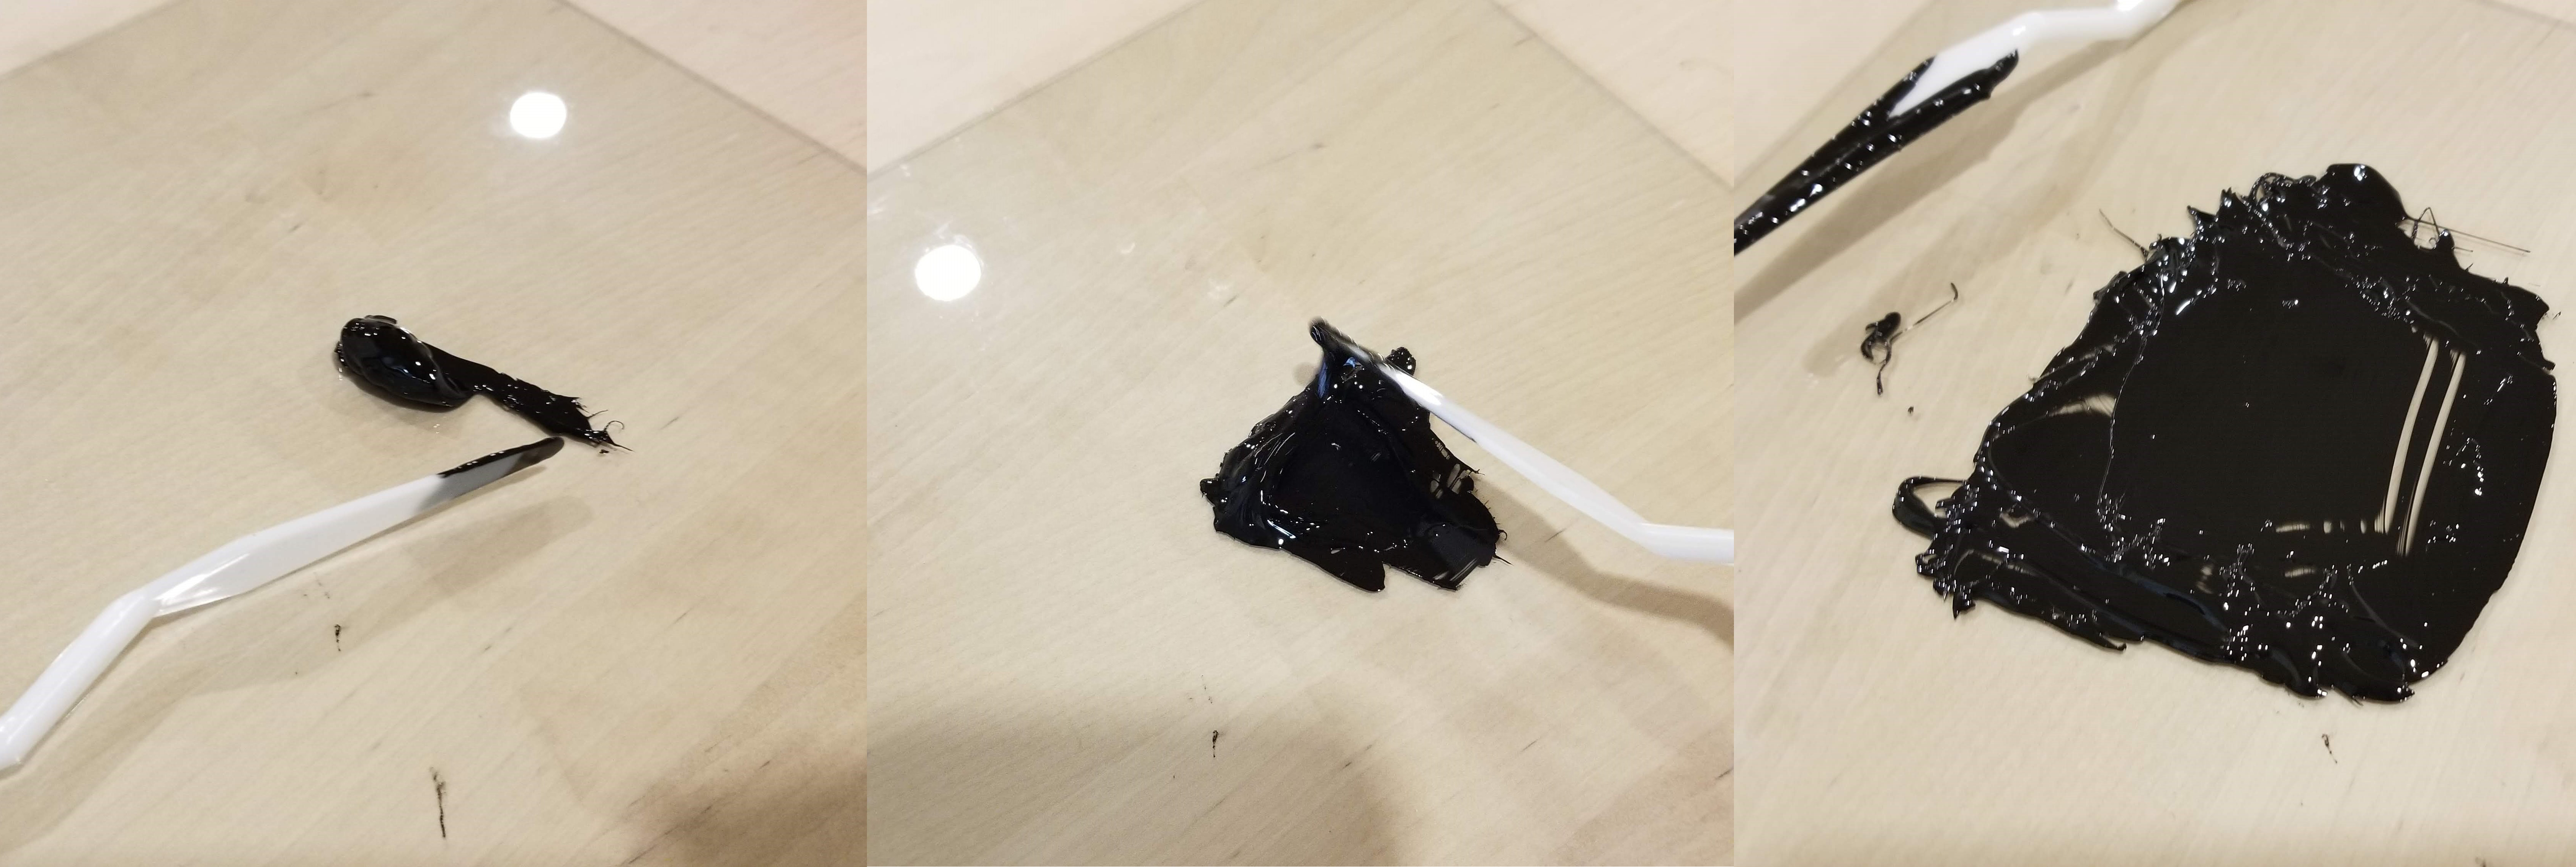
Figure 4: Working the ink. Ink comes out very viscous from the jar, and needs to be mechanically mixed to be softened.
Once the ink has been thoroughly softened, it can now be spread with a brayer (Figure 5). The aim of this is to create a flat patch of ink, that gets transferred to cover the brayer uniformly. Make sure to roll the brayer along both axes of the glass plate (up-down and left-right) so that the ink is well spread.
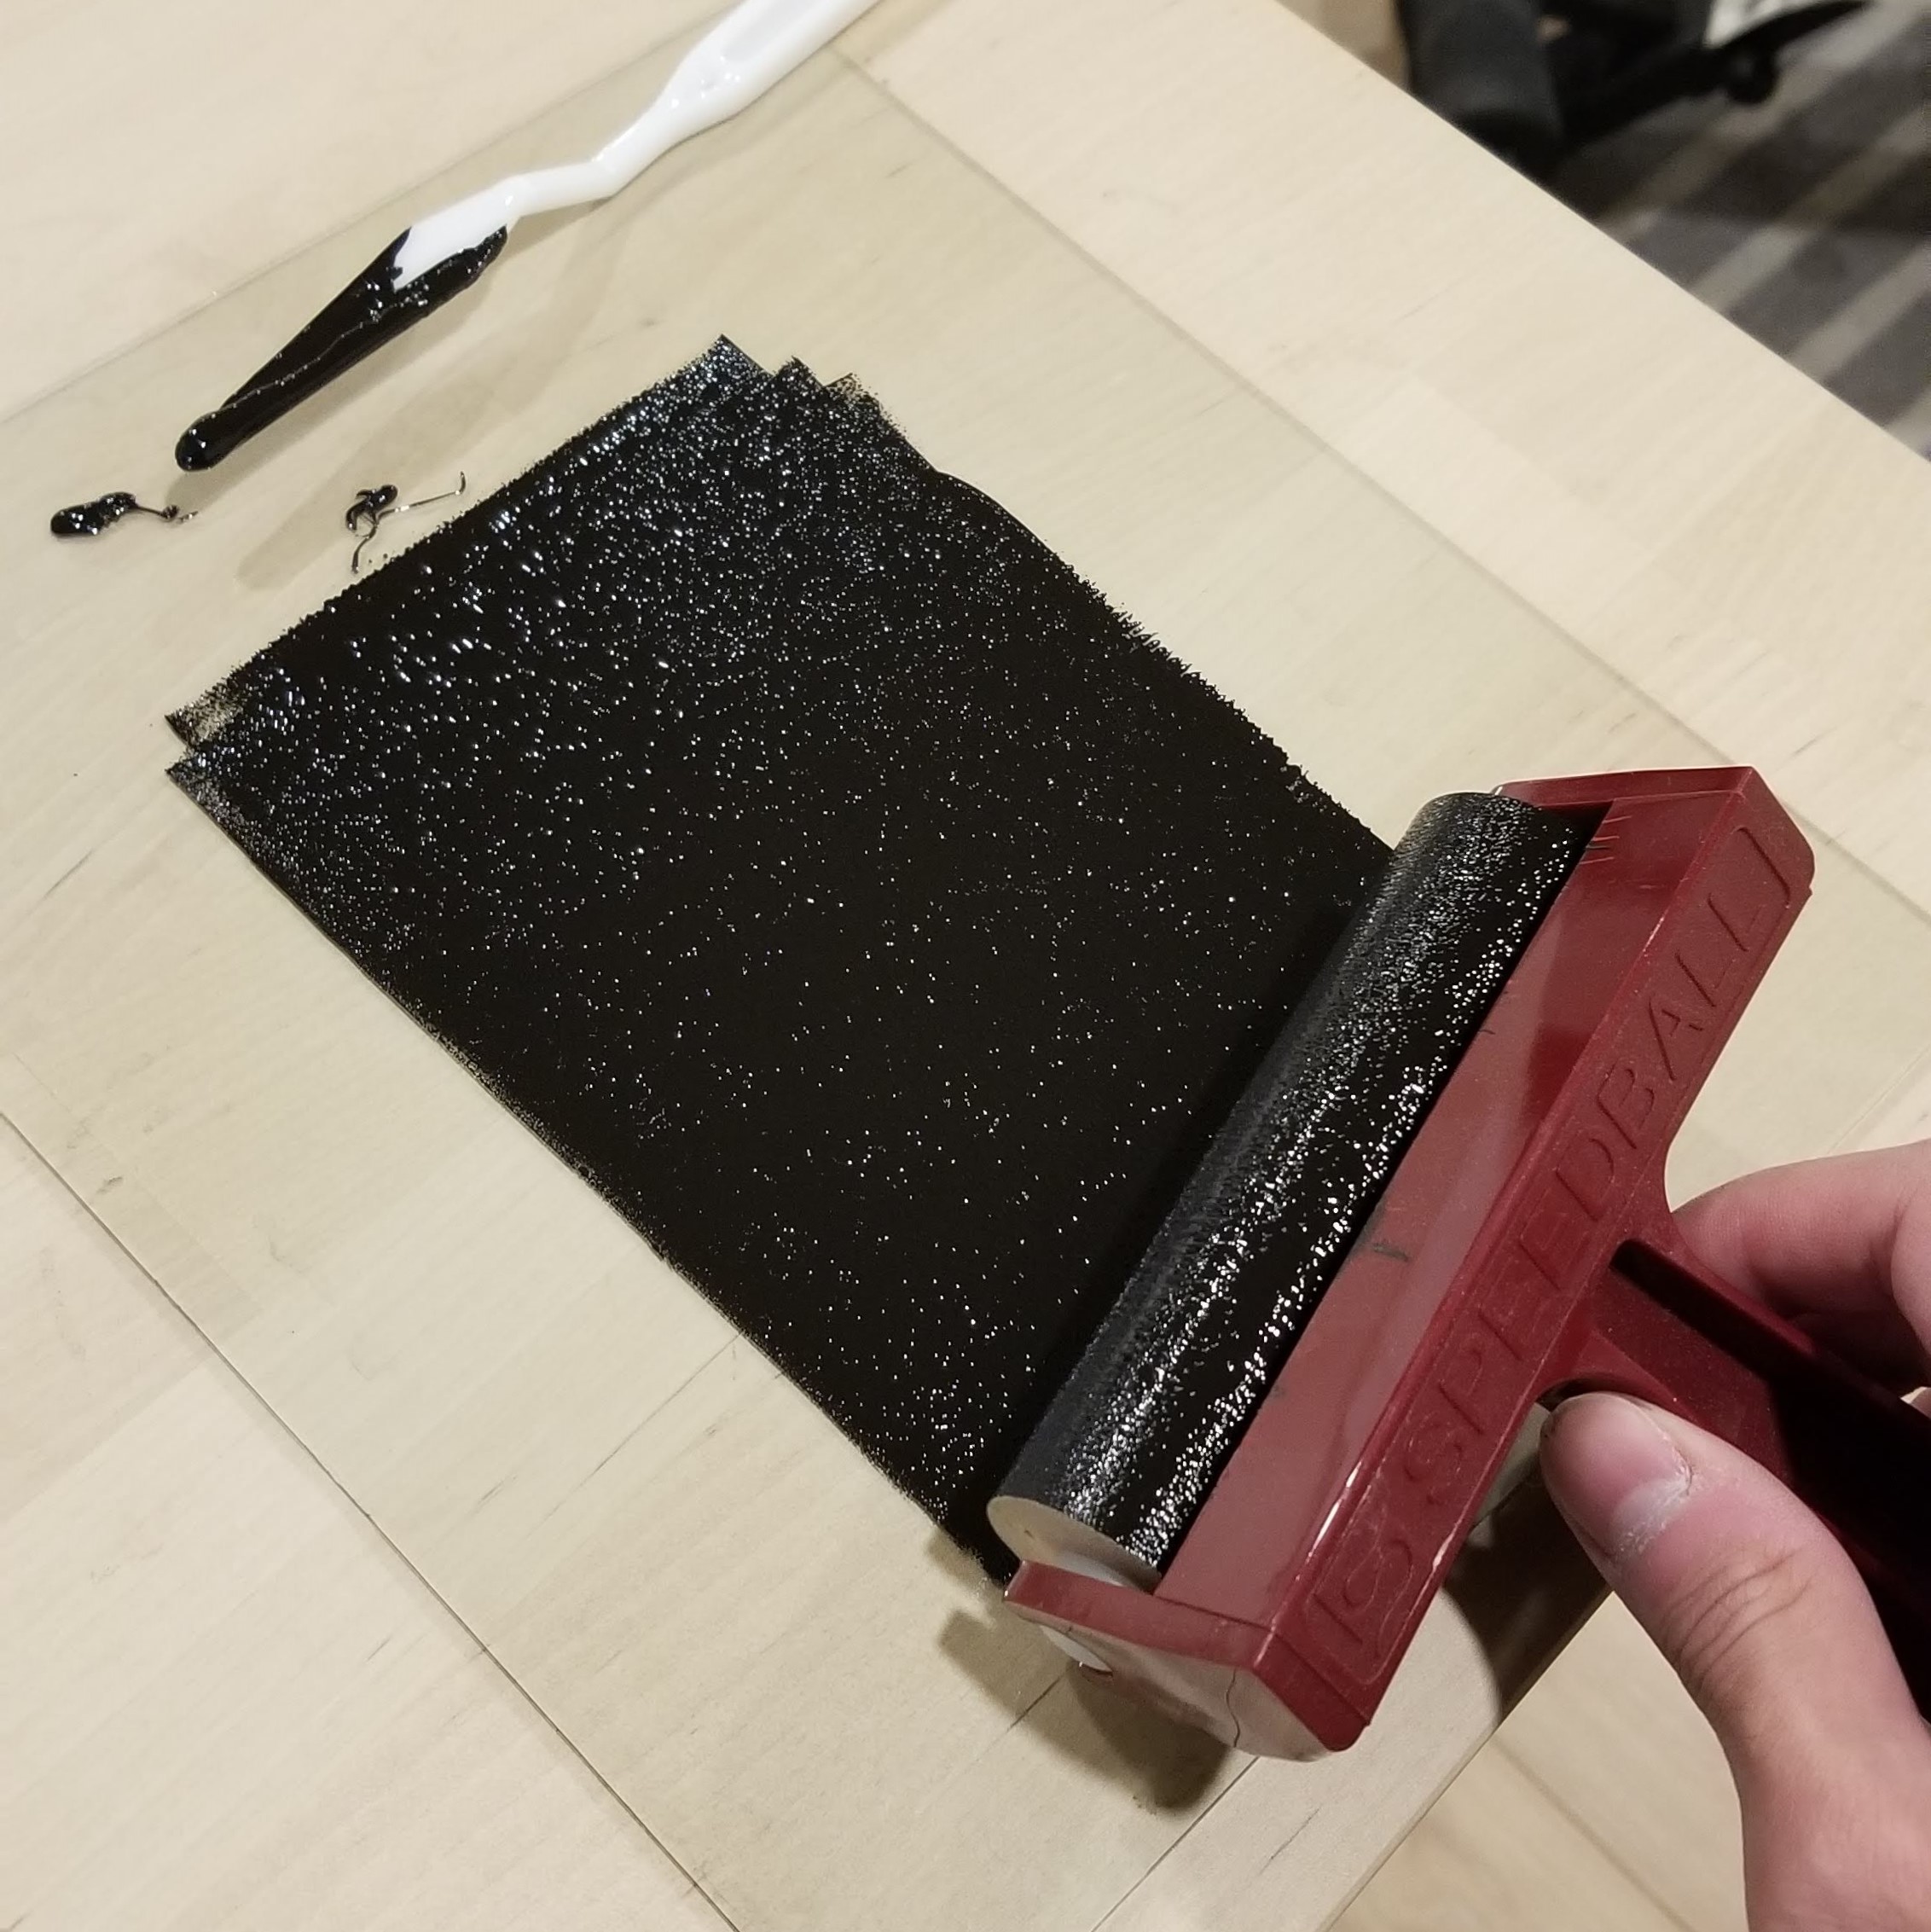
Figure 5: Spreading ink with a brayer.
Keep spreading the ink until it is of uniform thickness. At this point, the ink should look tacky, with a surface often described as looking like an orange skin (Figure 6). I usually go by the sound though, once the ink is tacky enough it makes the distinct sound of wet paint as you roll over it with the brayer.
If the ink seems too wet, there’s likely too much ink and the layer is too thick. Either spread it out more to thin out the layer, or try to scoop some ink off using the palette knife. If you’re using water-based ink, it’s probably just better to wait for it to dry a bit, since they dry very quickly. Scooping some off would likely just result in too thin and dry a layer.
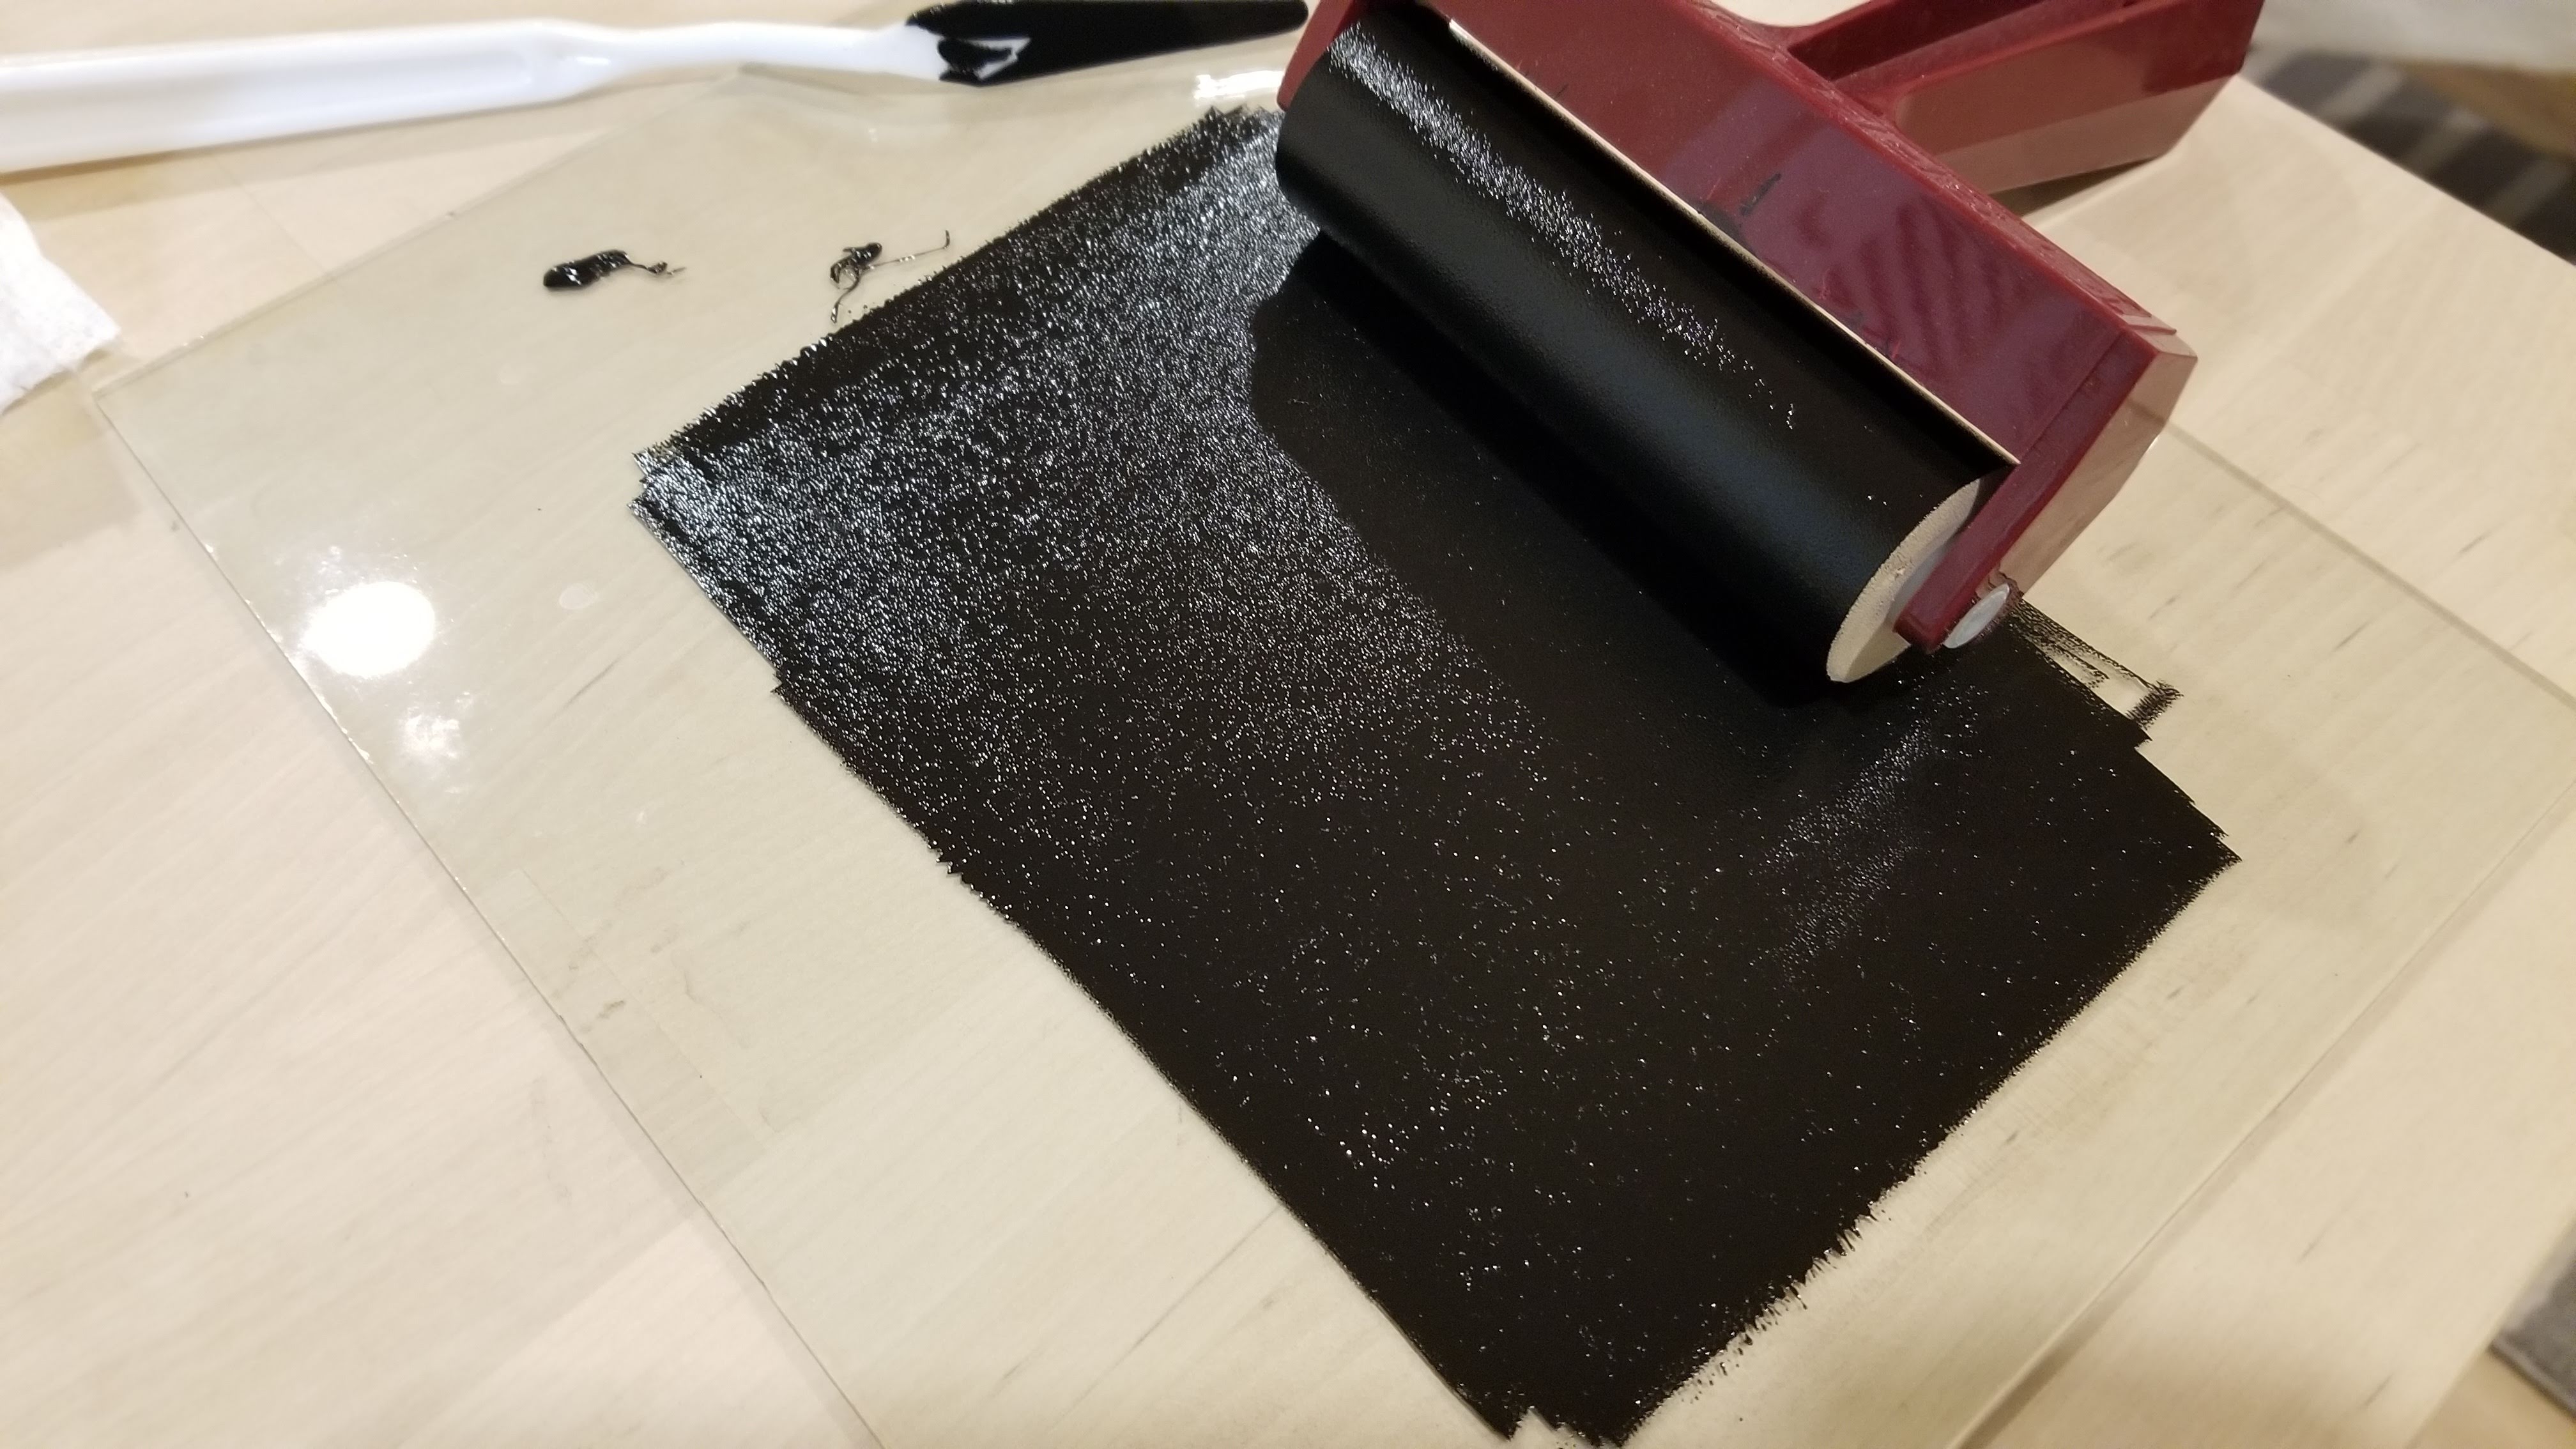
Figure 6: A uniform patch of ink.
Getting the correct consistency is really the key component in printmaking. It directly translates to how much ink ends up on your print, and whether it is too dry and splotchy, or too wet and filling small details with ink.
Once you have the right consistency, use the brayer to spread ink onto the block. You can use multiple passes here, going back to the glass to refill the brayer and transfer it onto the block. Simply make sure that you roll over the entire block at the end to avoid streaking caused by different passes of the brayer. A fully loaded block is shown on Figure 7, notice the shiny and uniform layer of ink.
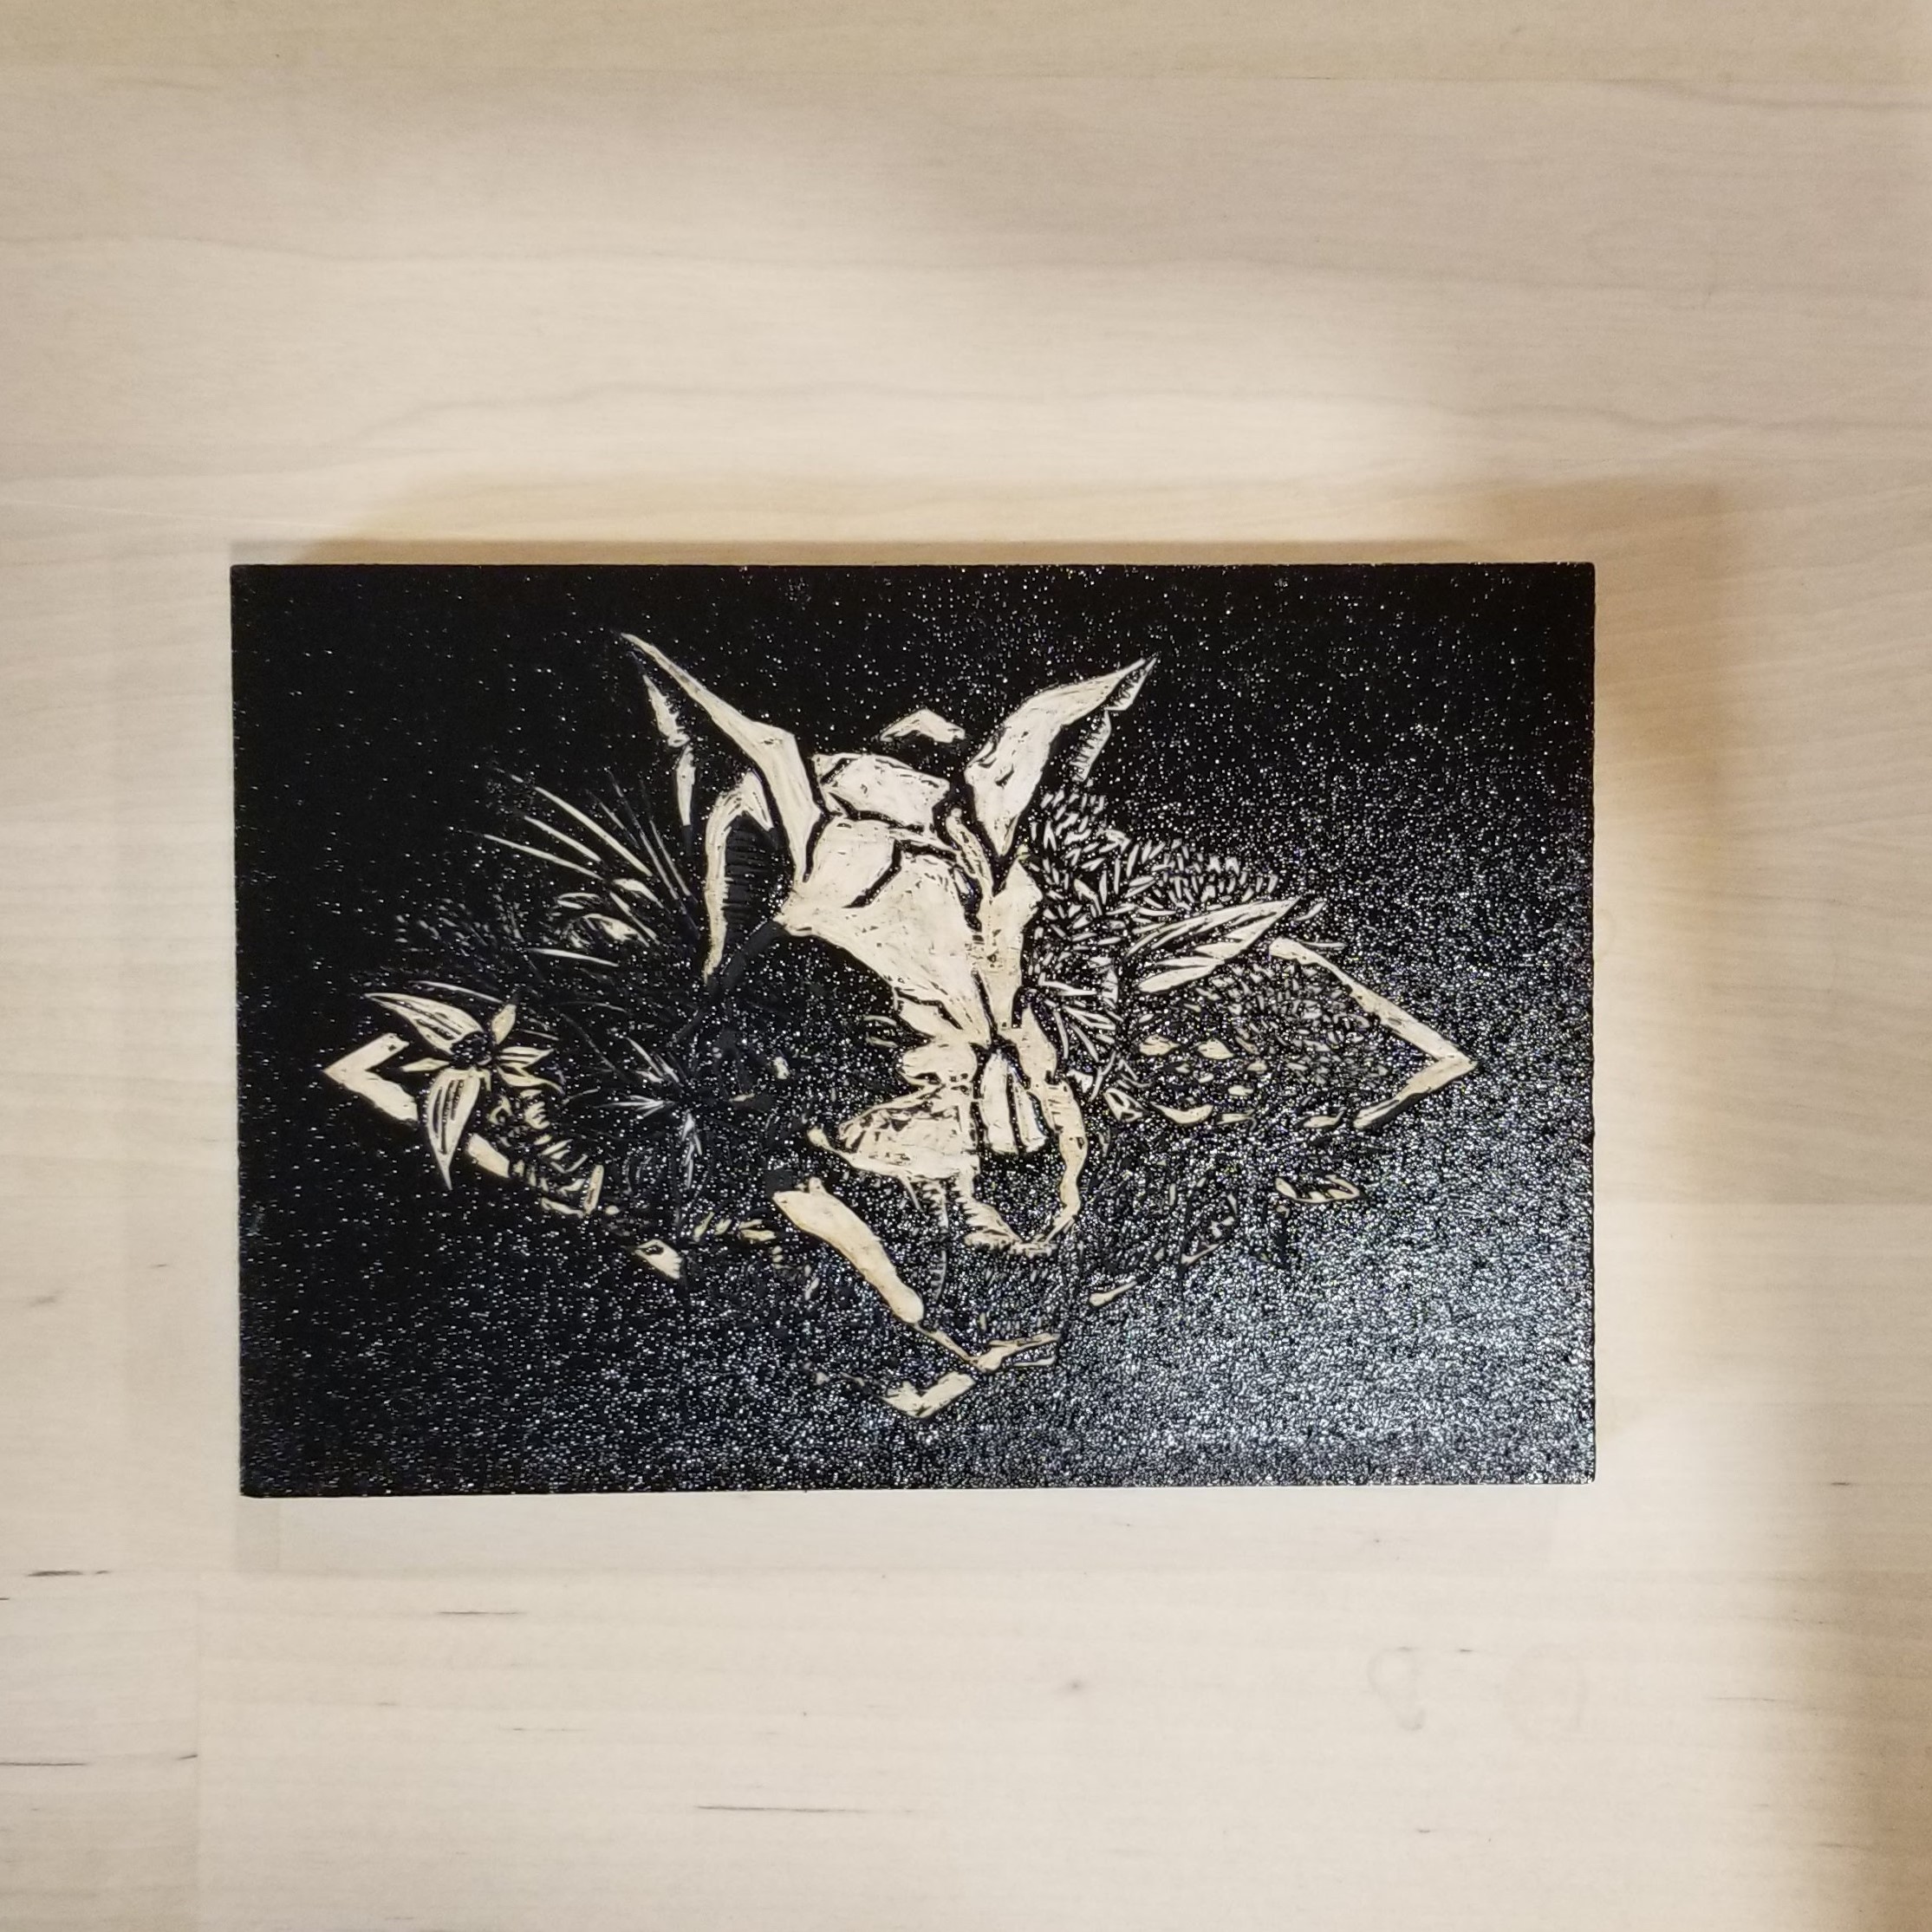
Figure 7: A fully inked woodblock.
Now, simply drop a piece of paper on then rub the back using a baren (Figure 8). Again, the choice of baren isn’t particularly important here - the back of a spoon or even just your fingers does the trick enough. Just make sure you rub over the entire surface enough to transfer ink. Don’t be surprised if this takes a lot of mechanical effort. Oil-based inks take a while to dry so the only way you don’t get enough coverage is if you didn’t put enough ink on the block or you didn’t rub it enough to transfer onto the page.
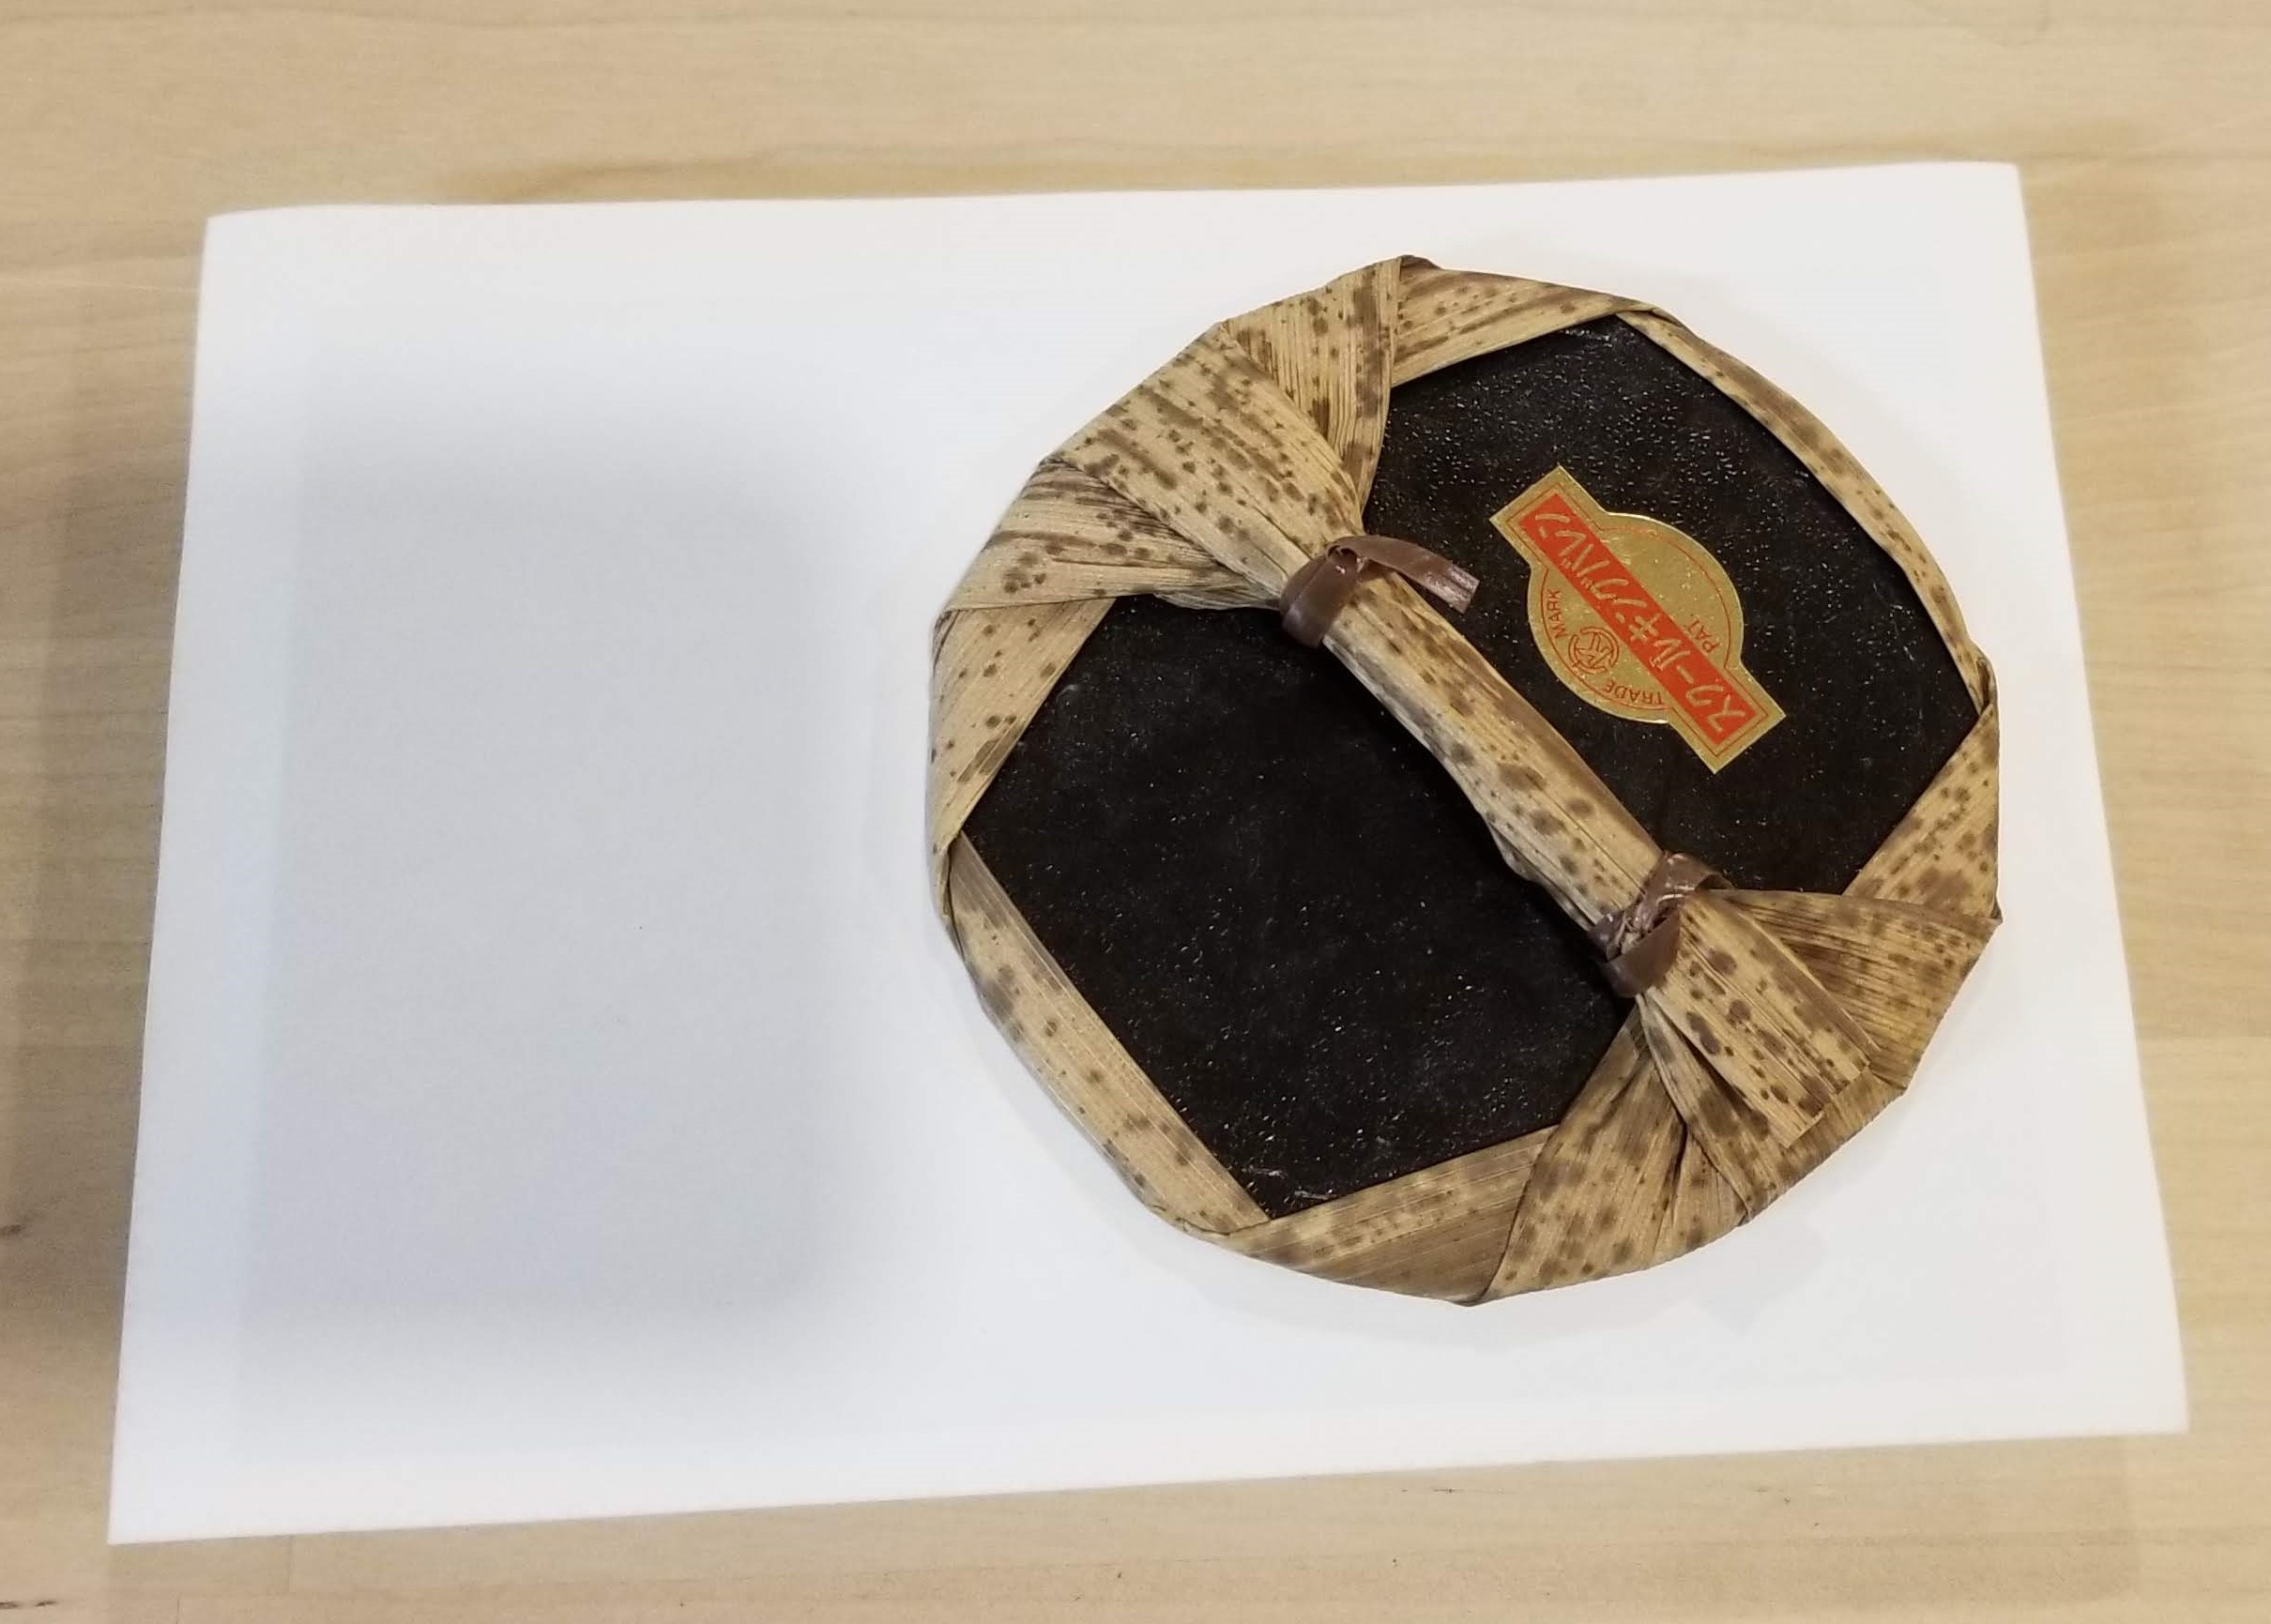
Figure 8: Rubbing a print on the woodblock with a baren.
A good way to know when you’re done is if the back of the page starts to look shiny from the burnishing (only using a baren, spoon, or any other hard surface - not fingers!). You can also always check by peeling a corner off carefully and placing it back down if it doesn’t have enough ink (Figure 9).
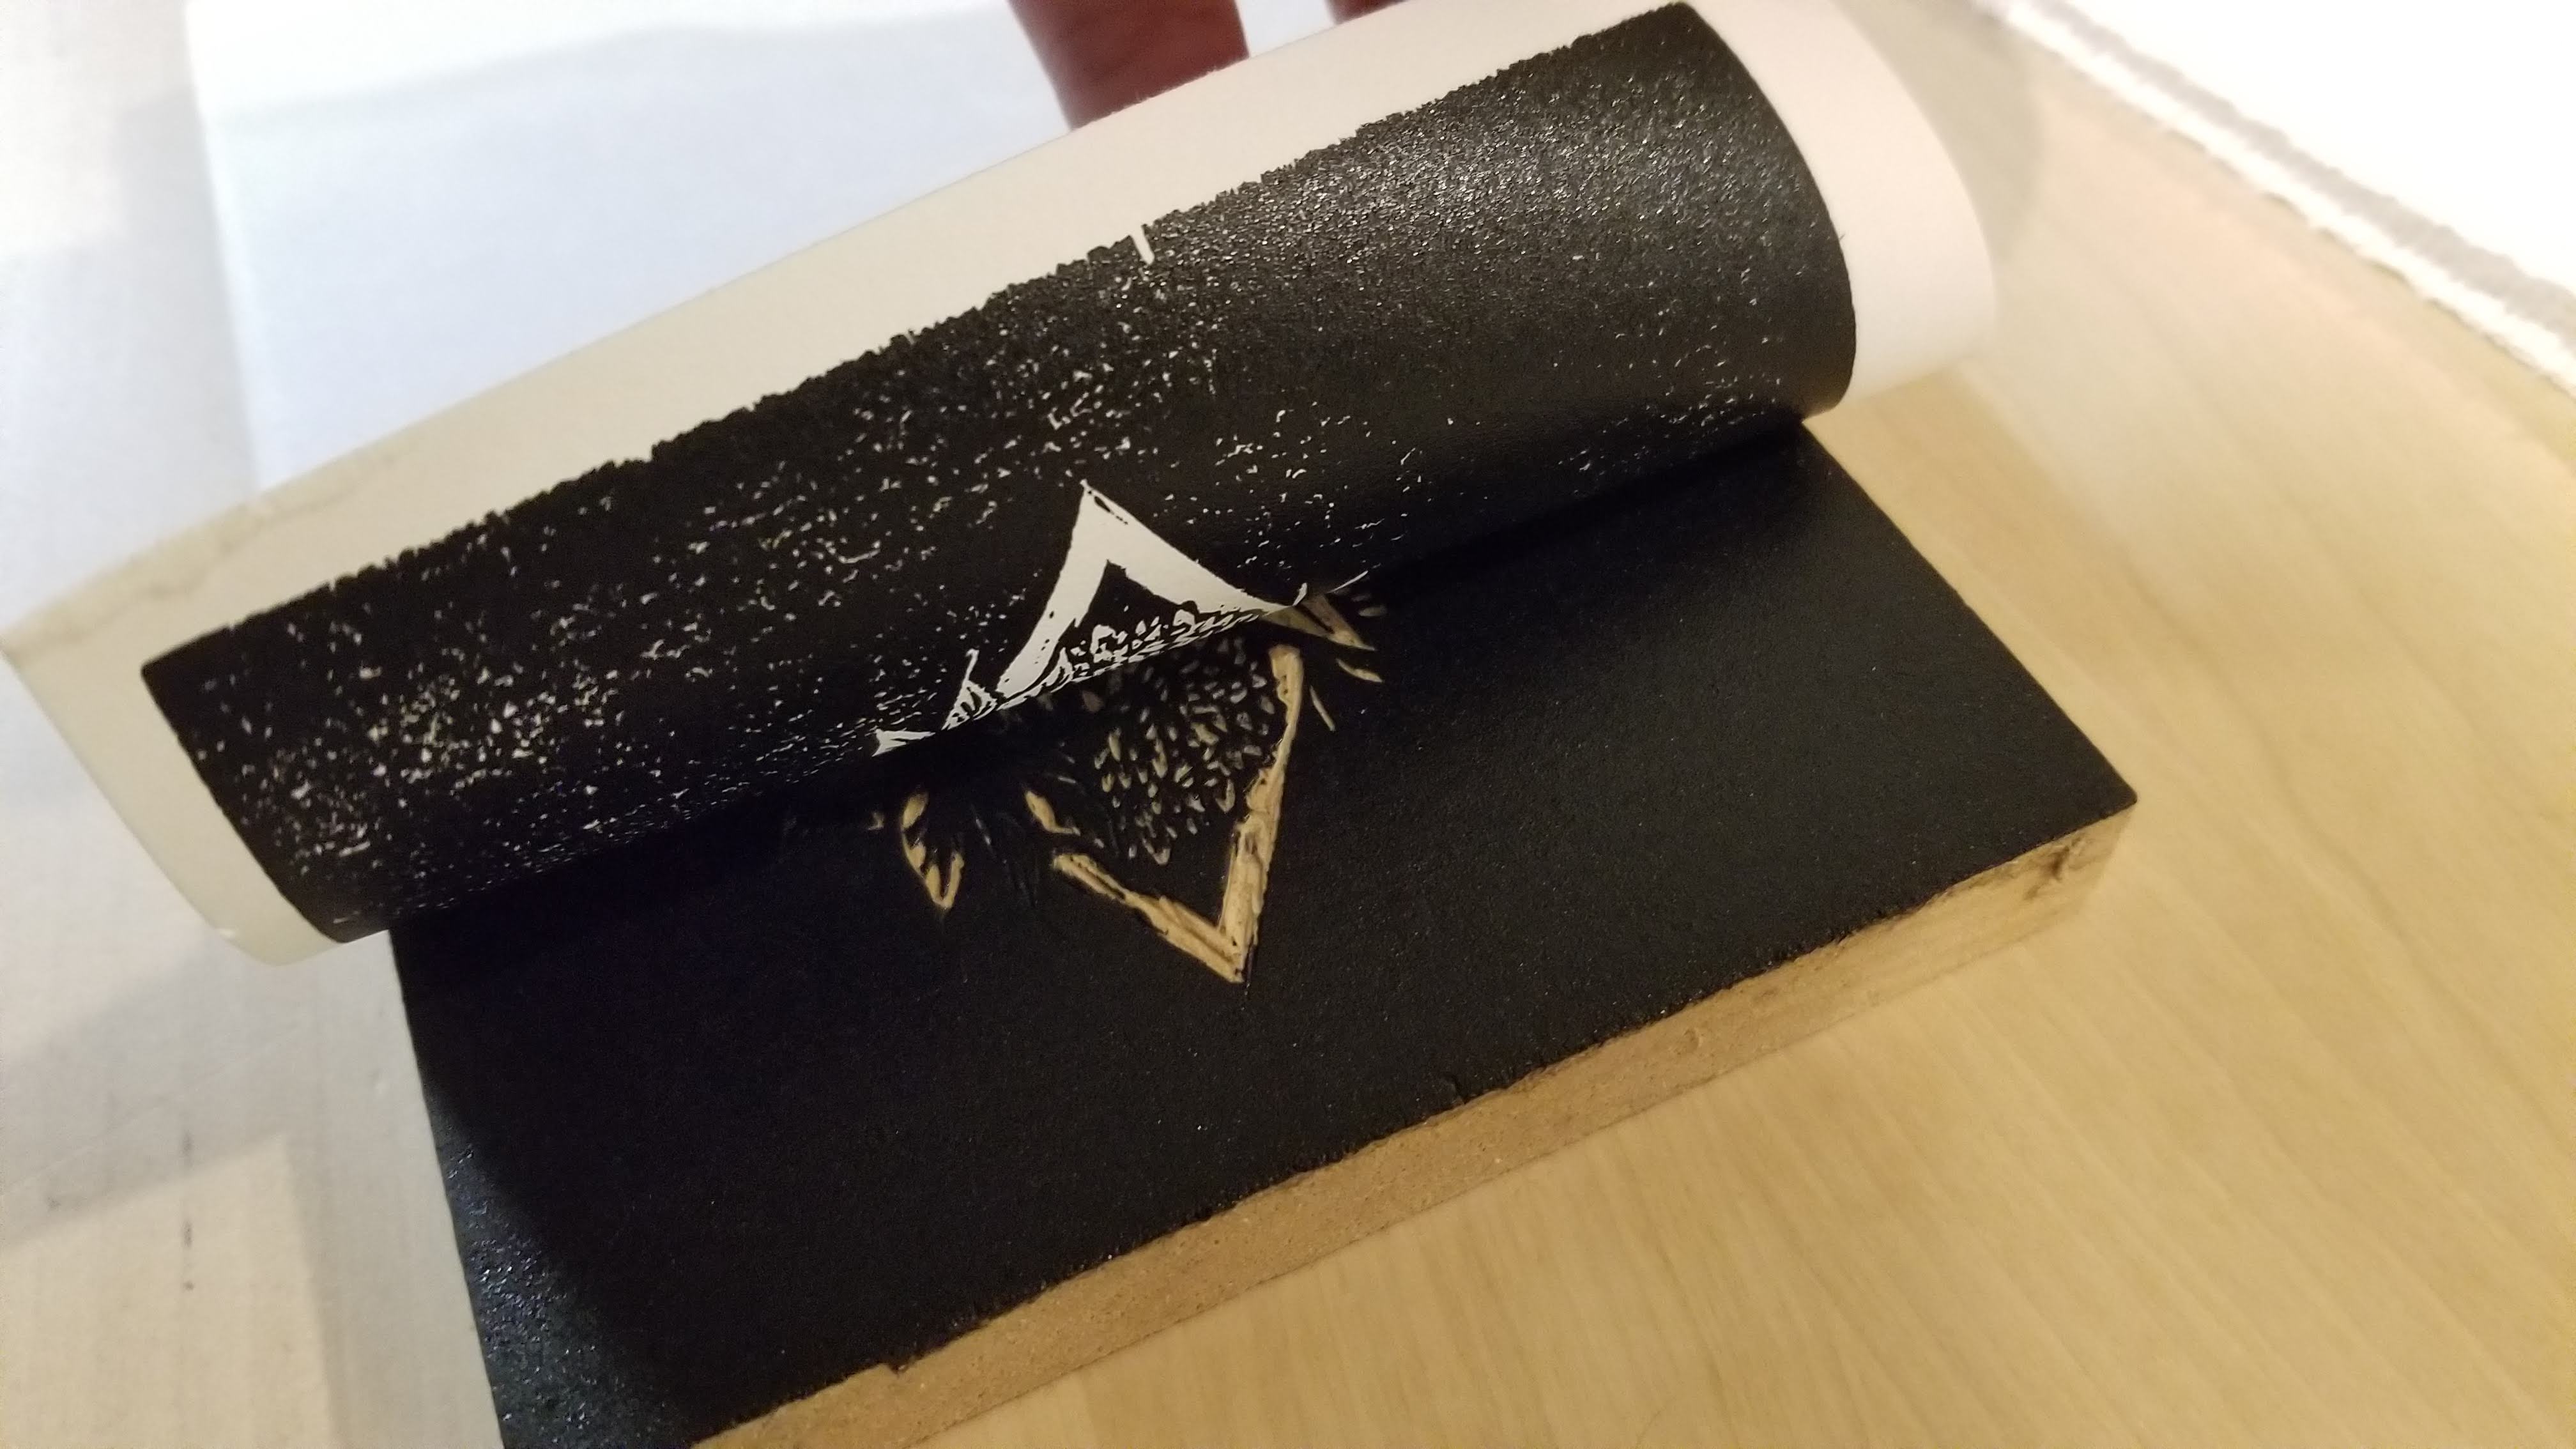
Figure 9: Peeling a print off.
Peeling the full print off, you should be done (Figure 10). At this point, you can just hang it to dry on a clothesline, and write the print number and initials. This is generally done with pencils on the bottom left margin.
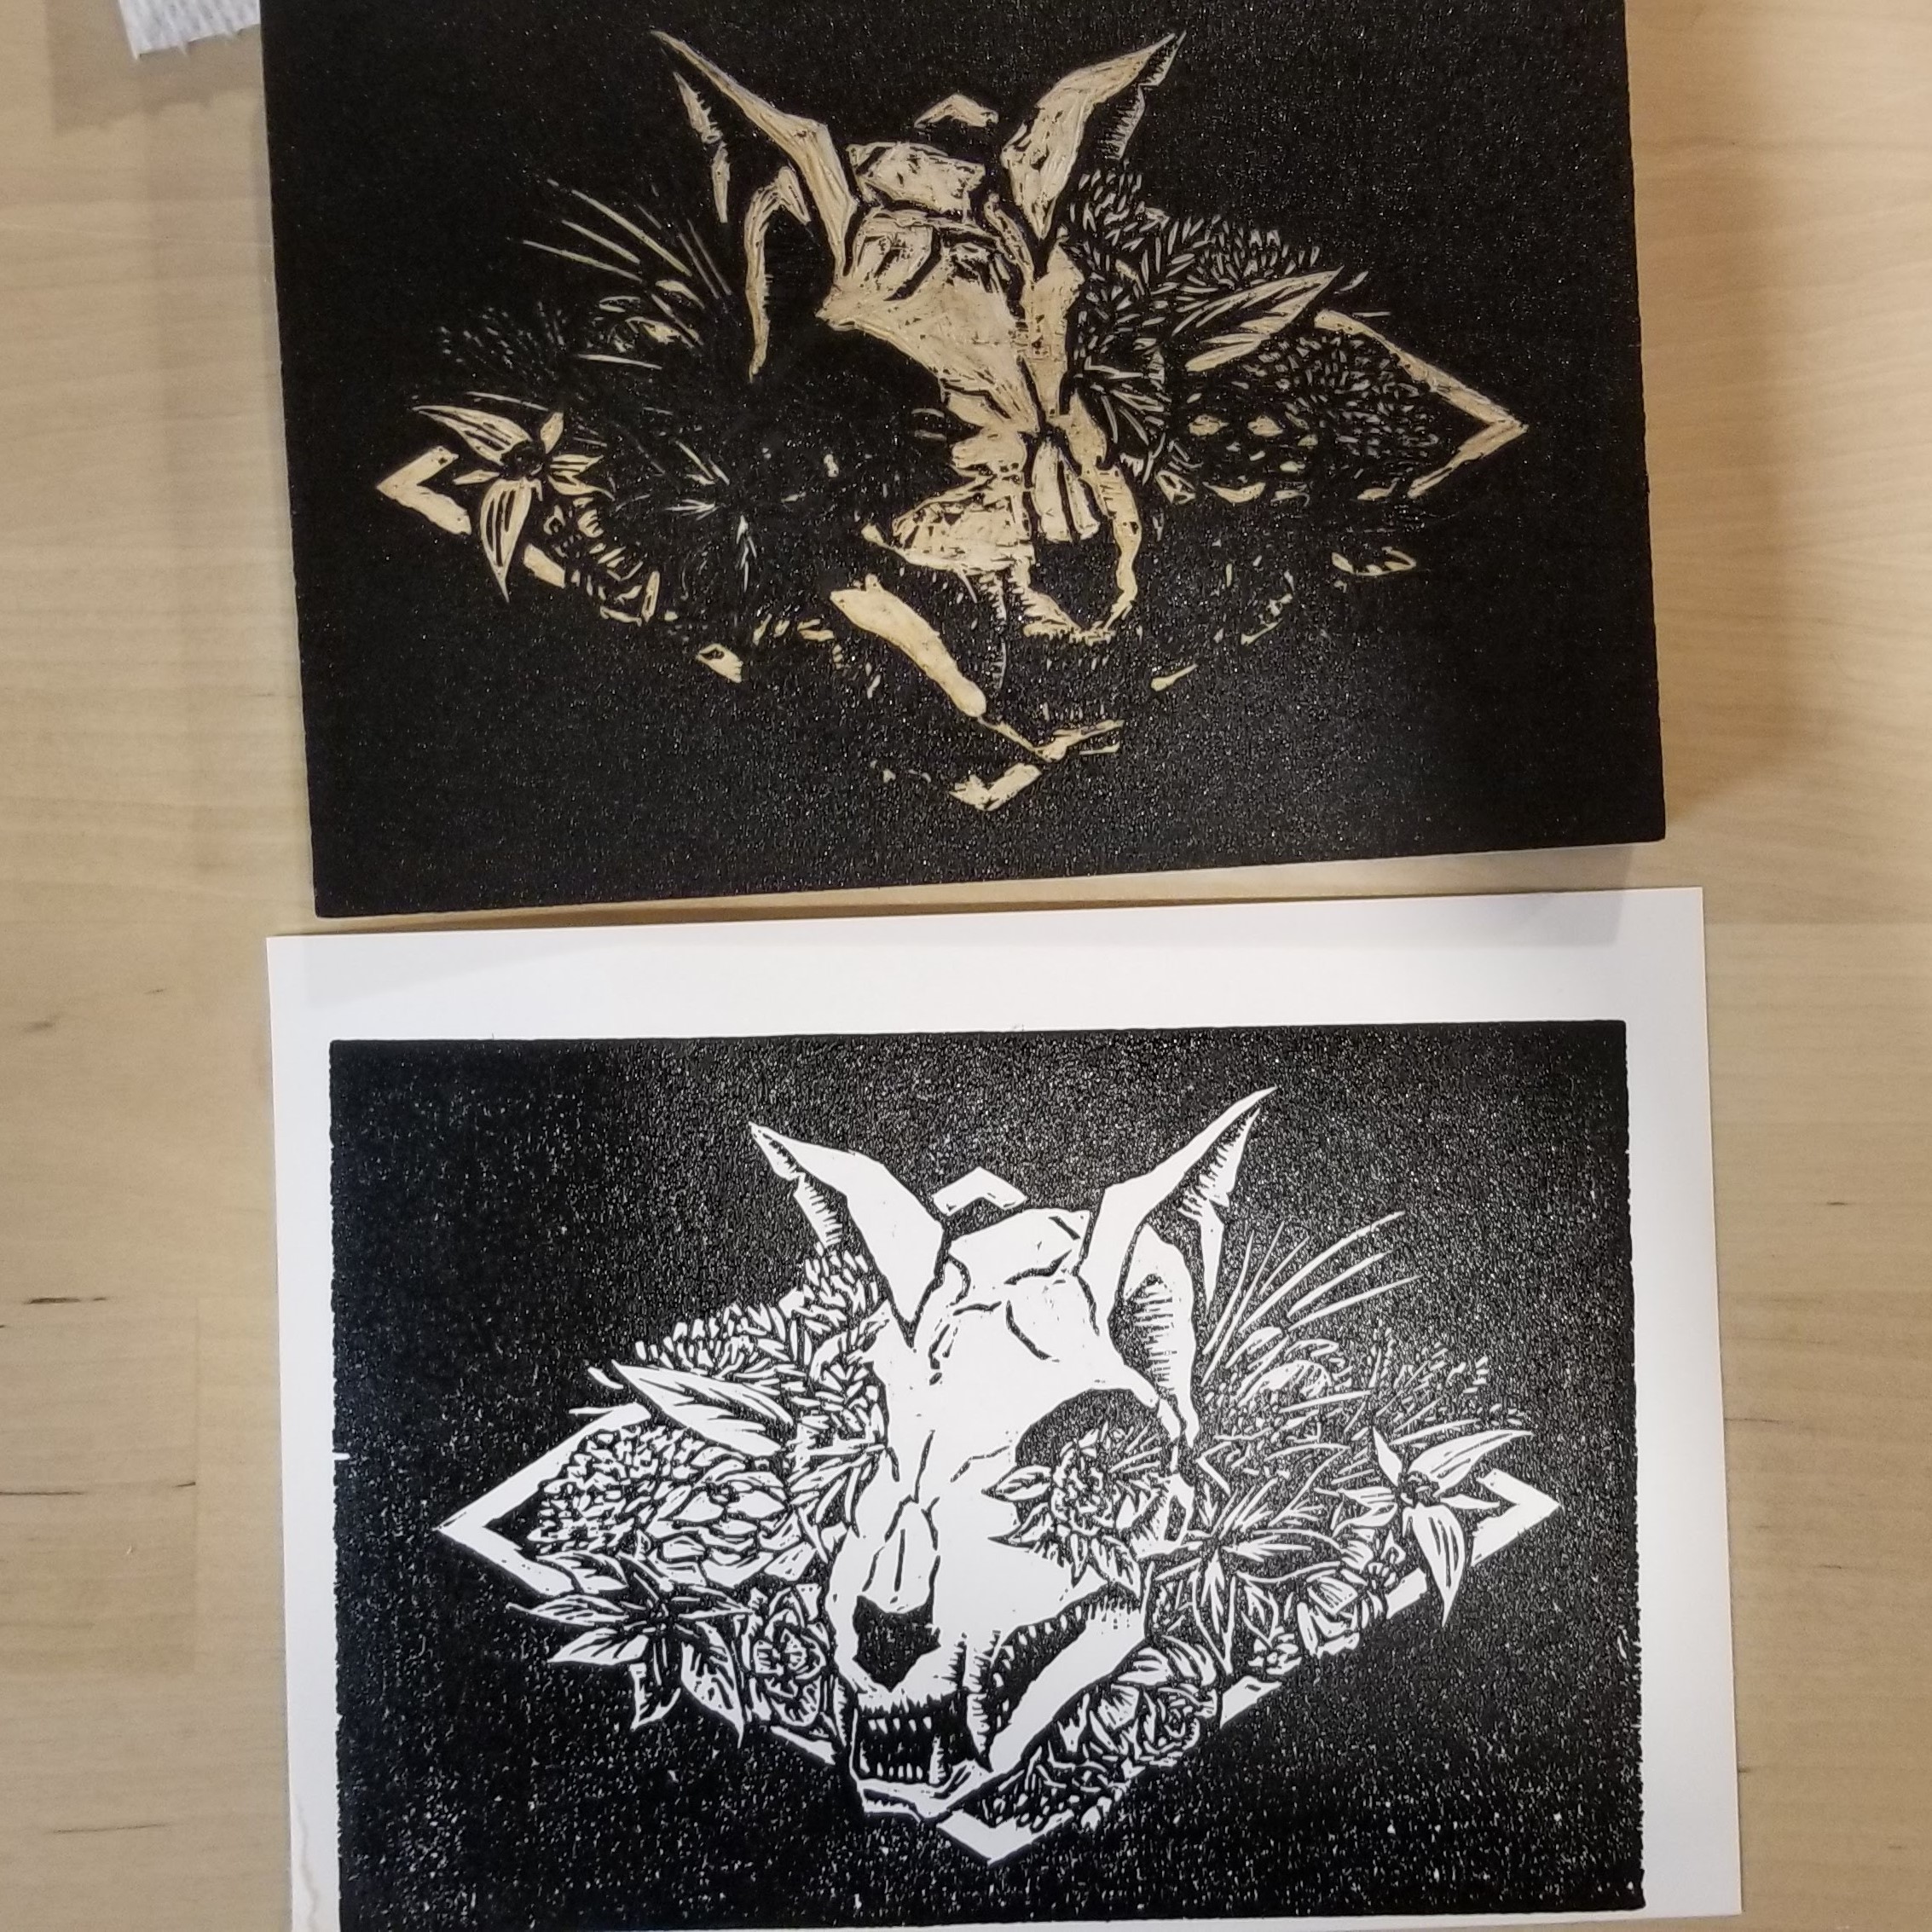
Figure 10: A finished print next to the woodblock.
In terms of cleanup (Figure 11), the leftover ink can be scraped off the glass using the palette knife and put on a small piece of parchment paper, which can be folded for storage. Oil paints dry by oxidation, so it should keep for a long while as long as air is pushed out of the parchment paper. As I said earlier, generally oil-based inks take other solvents to cleanup, but this particular safe-wash inks can be cleaned using soapy water. I find that soap actually isn’t particularly required as long as there isn’t too much of it - some mechanical scrubbing with running water is enough to clean the ink off plastic and glass. I’d imagine some soap would be required for fabrics though (luckily I didn’t have any fabric messes here).
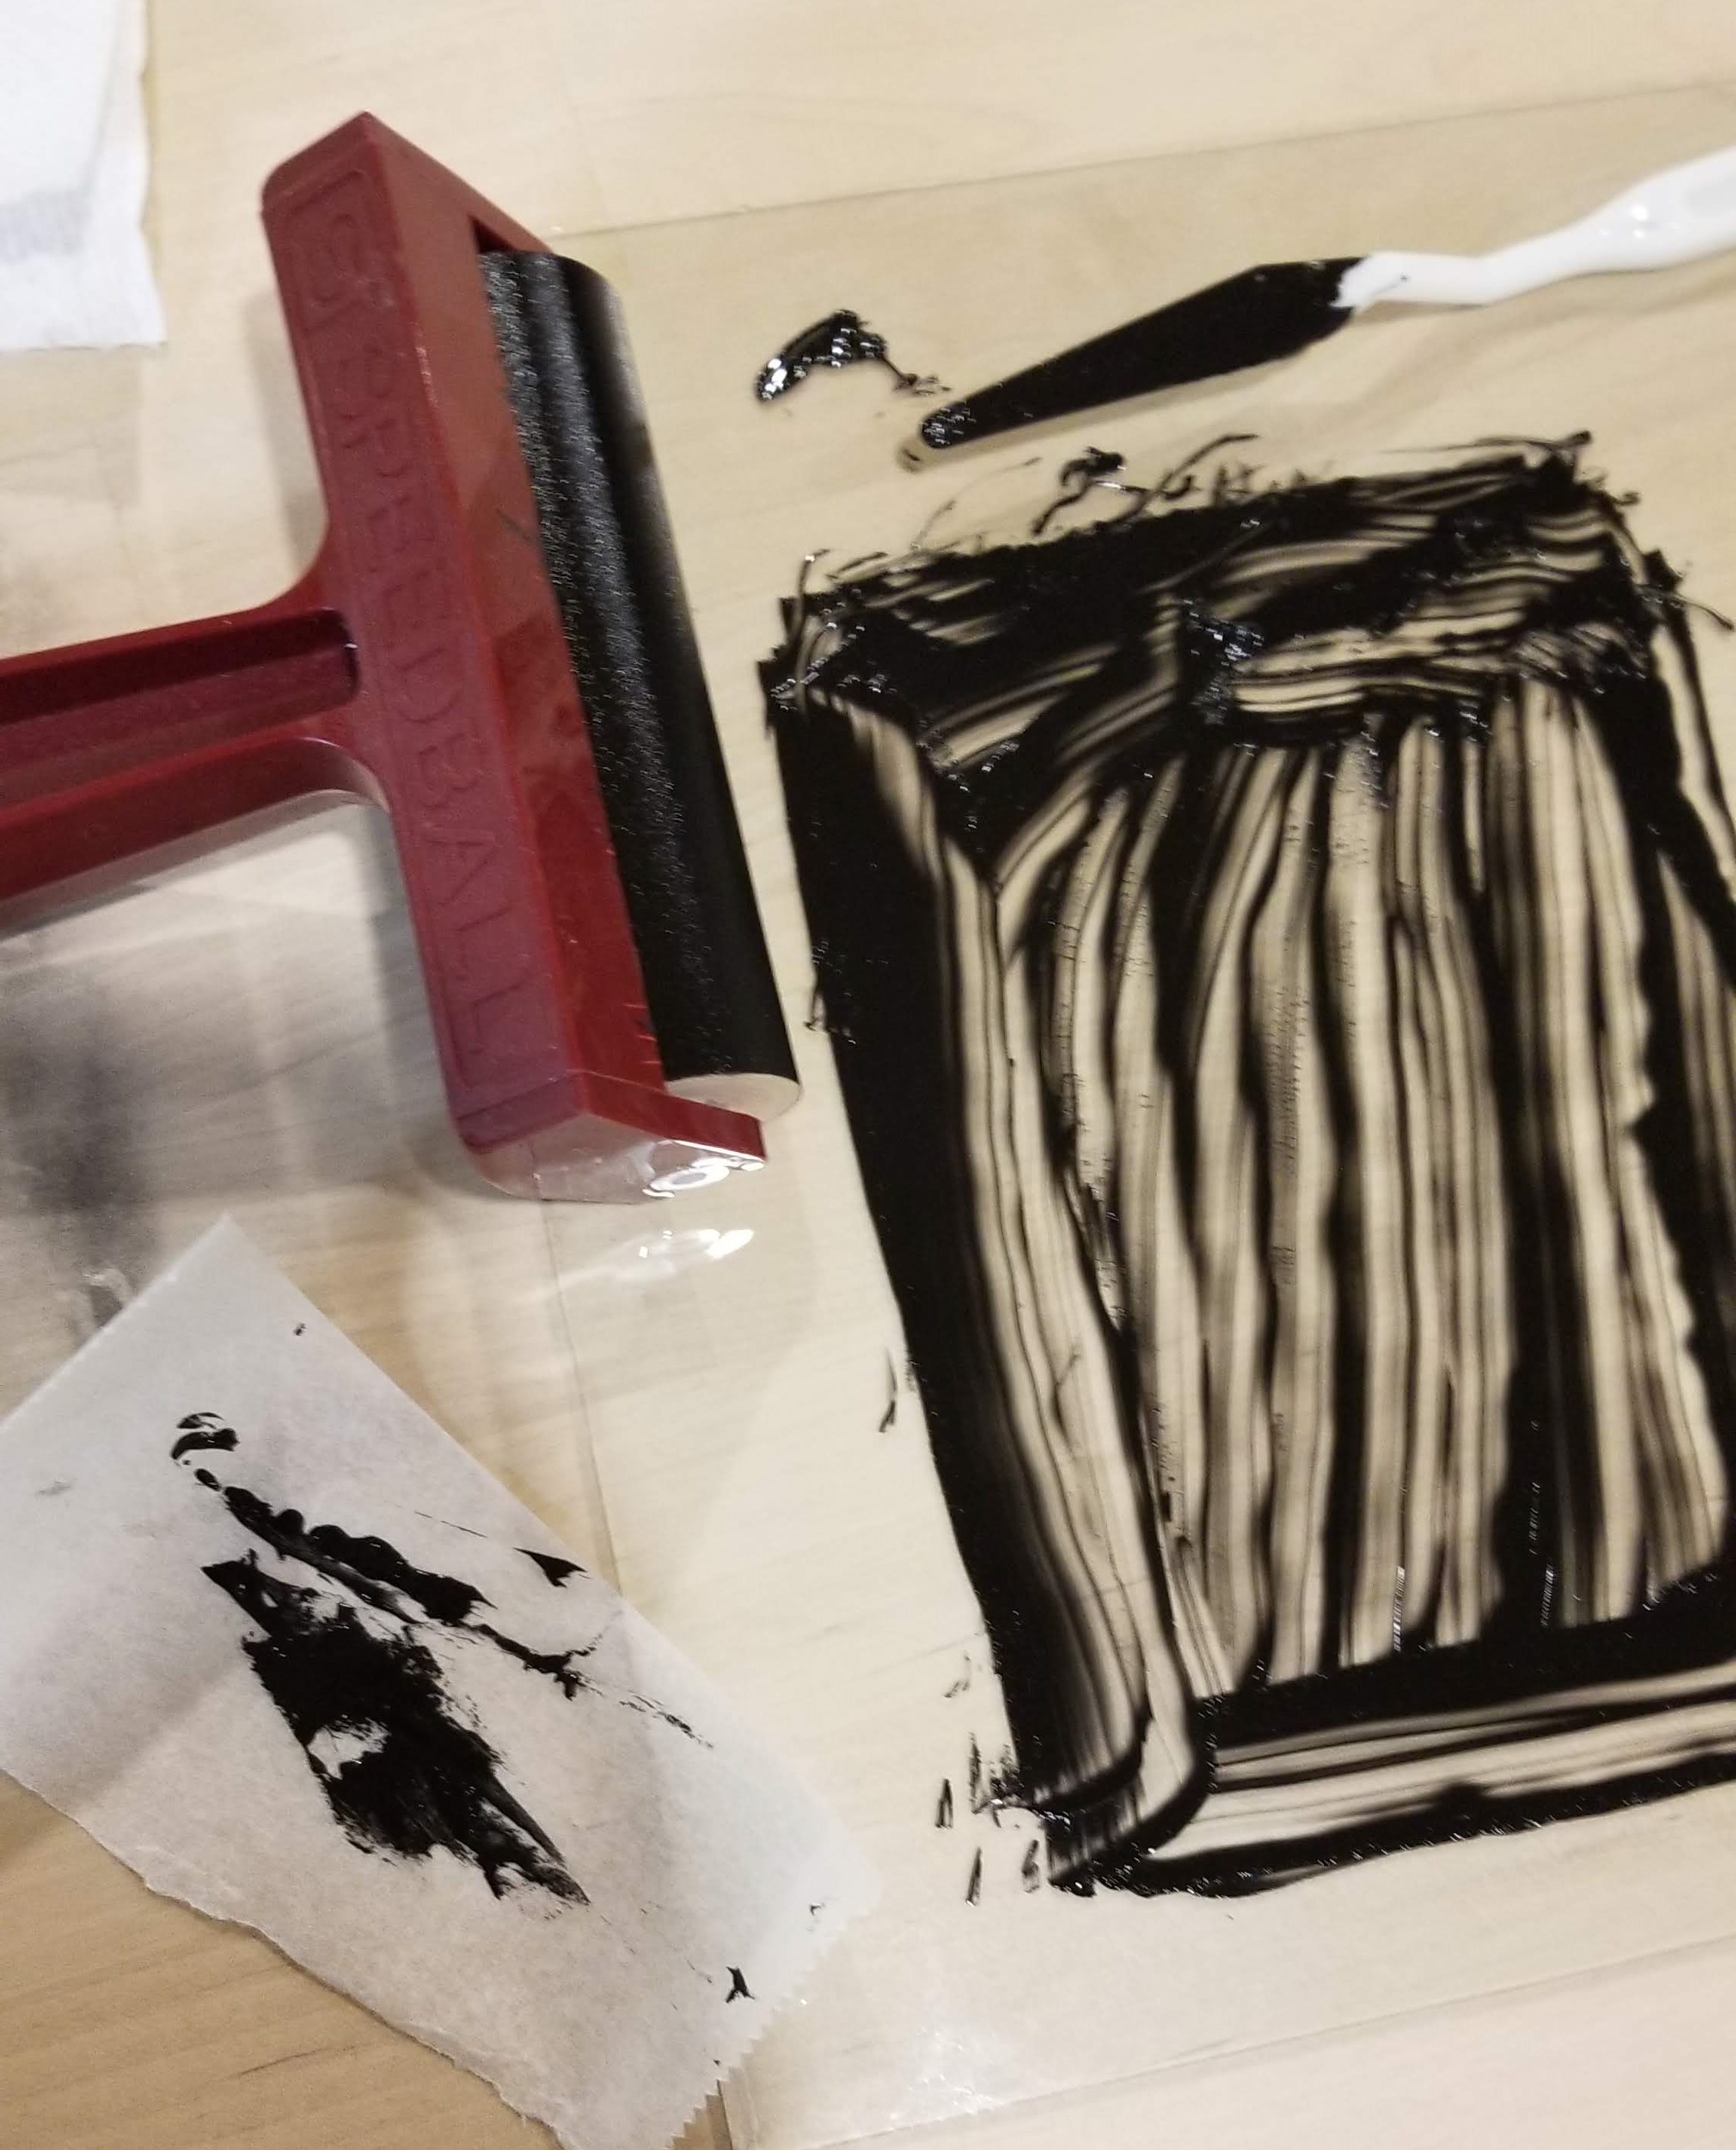
Figure 11: Cleanup.
Oil- vs Water-based Inks
Trying out the oil-based inks for the first time, I have to say that they are much easier and more forgiving to use than water-based inks. In my experience, water-based inks dry much too quickly, especially on wood. The wood is likely absorbing a lot of water, further speeding up the drying time. A comparison is shown on Figure 12, where the water-based ink is shown on top and the oil-based ink is shown on the bottom.
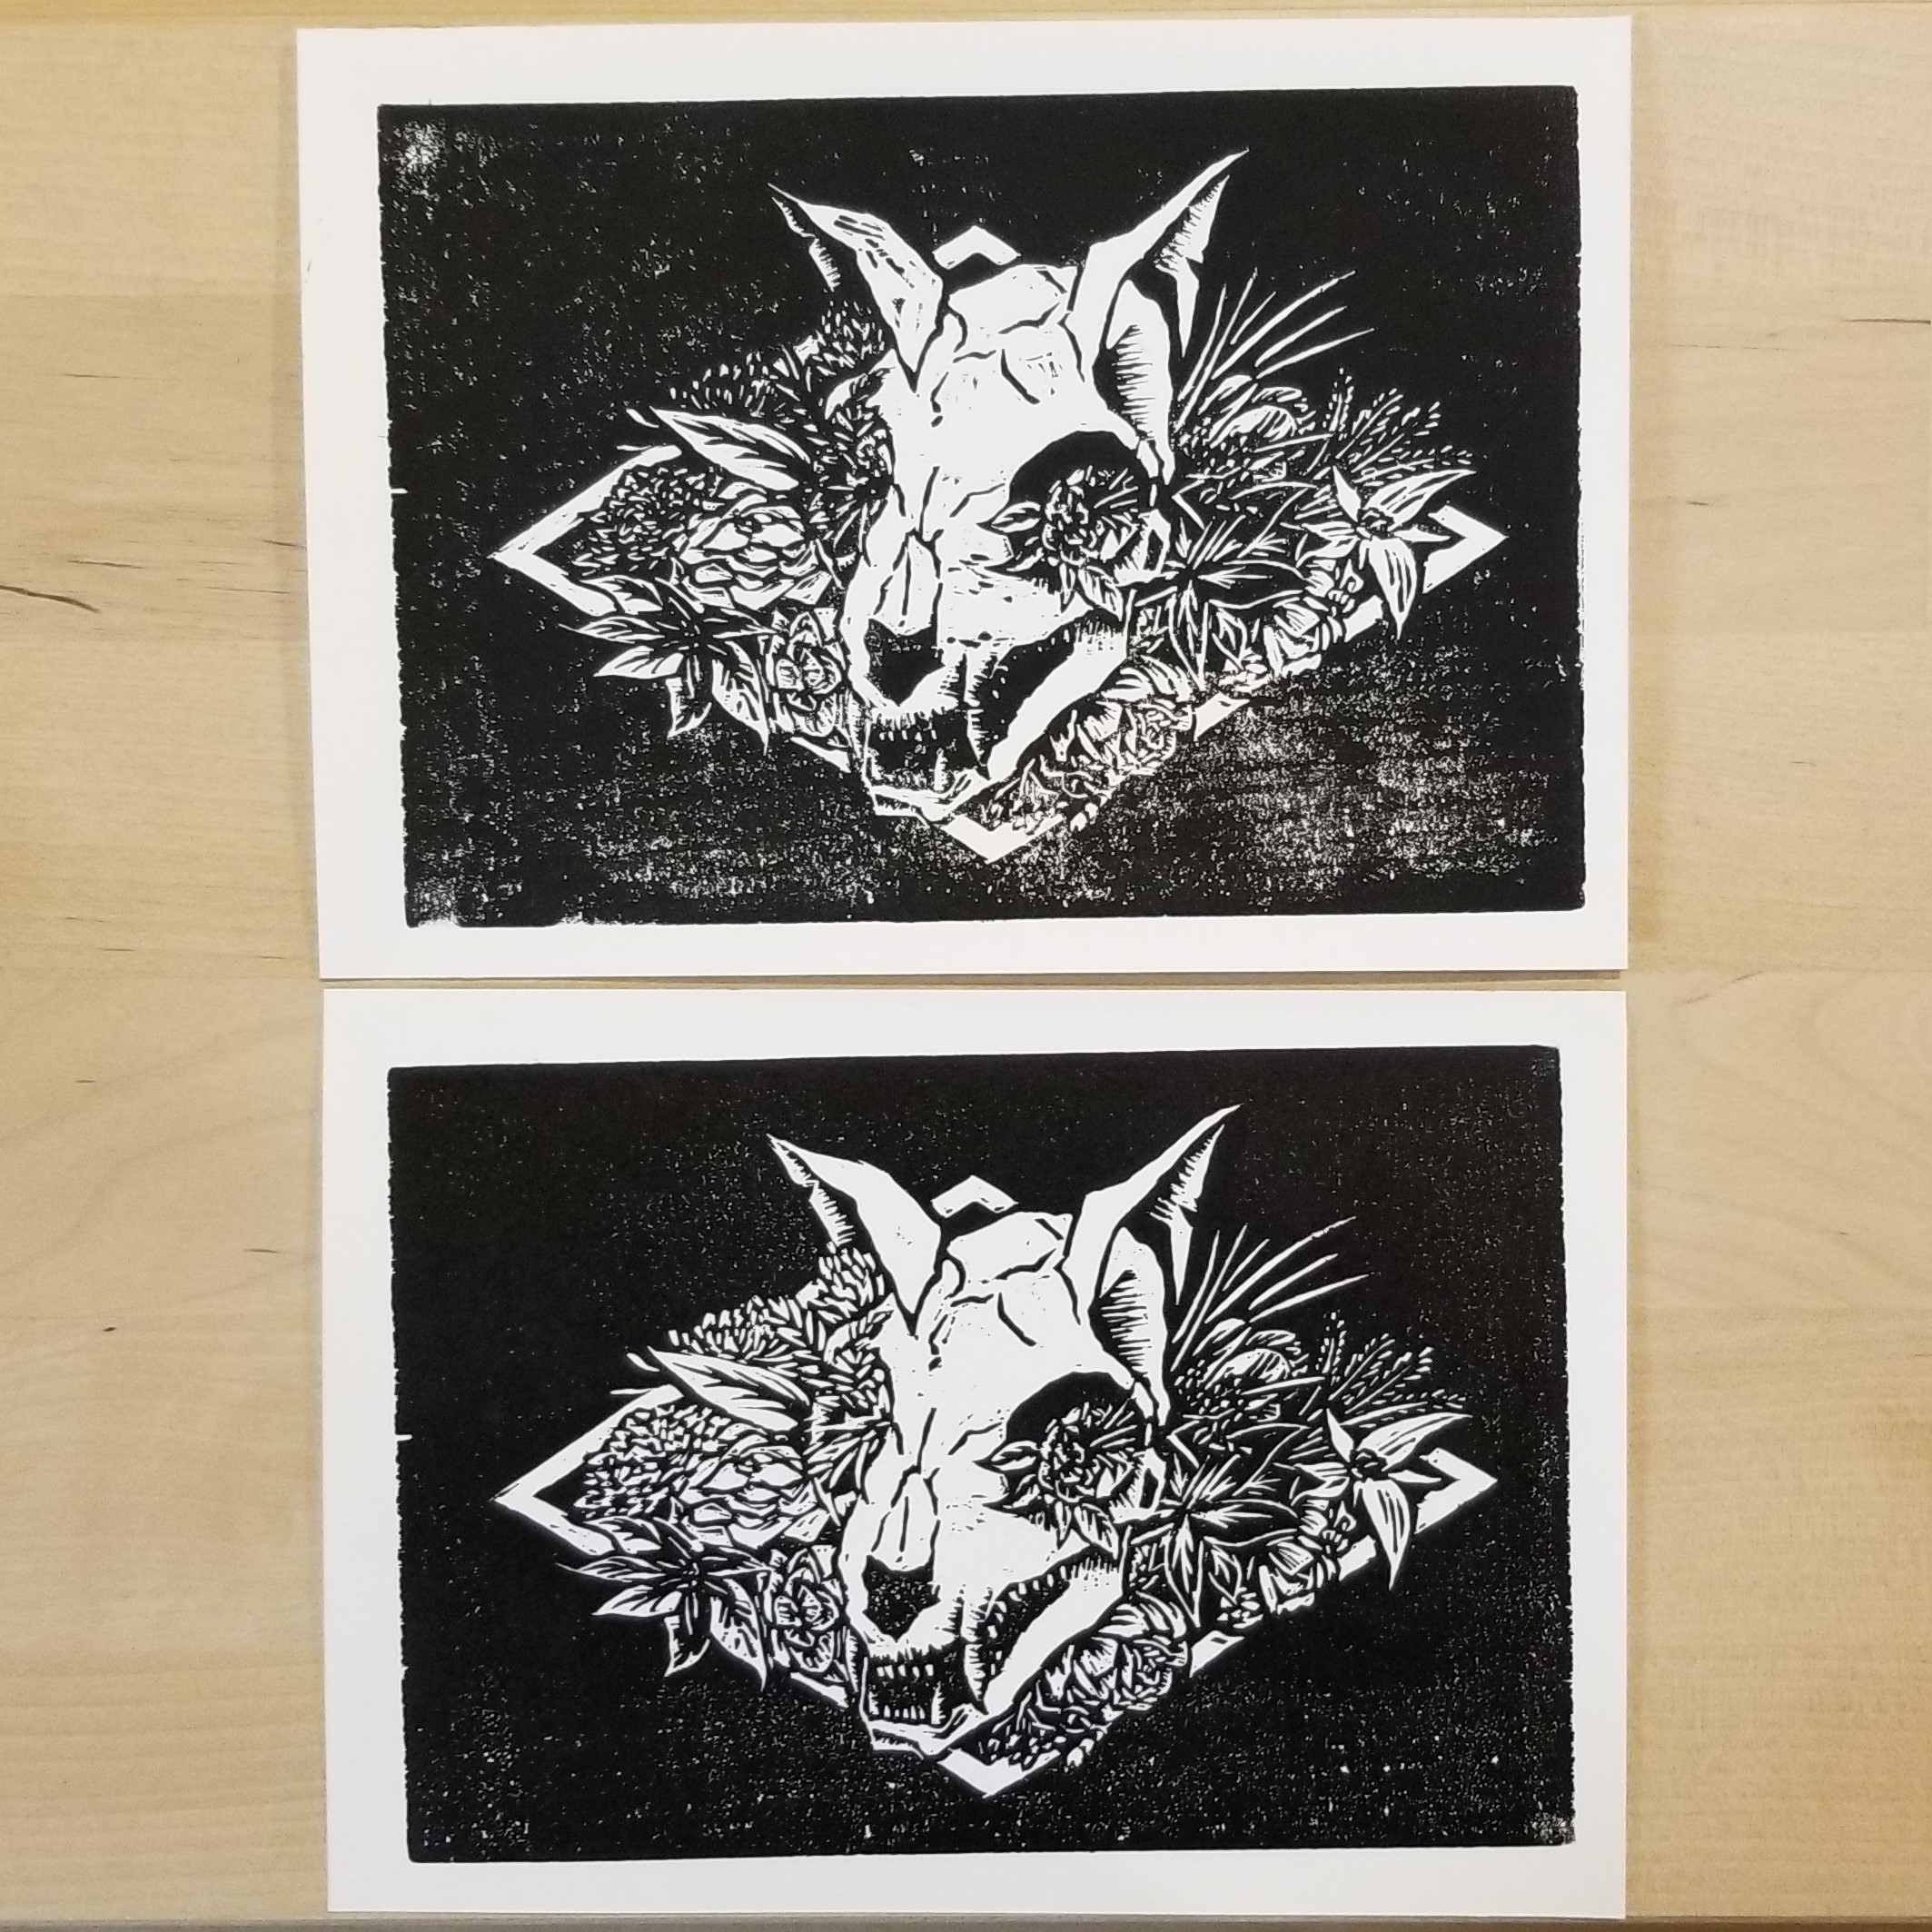
Figure 12: Comparing a print with water-based ink (top) to oil-based ink (bottom).
Notice that the water-based ink is very splotchy on the large black fields, while the oil-based inks are a lot more uniform. The top print here was the best I could get out of water-based inks, notice that this wood block was actually more loaded with ink than the oil-based block, given that the smaller cuts in the flowers on the top left are more filled with ink. This also highlights the bad tendency of water-based inks to spread out and bleed into unwanted parts of the image, while oil-based inks tend to stick to where they are laid down. This is also a problem for woodblocks, which could warp and expand in unexpected ways as it absorbs more water.
Additionally, when working with water you have to make sure that there are no oils on the block, paper, and roller to make sure that no surface inhibits the transfer of the water-based inks. Again, this means that oil-based inks are much more forgiving, which are still able to transfer even on dirty surfaces. This also means that the block has to be washed prior to use, which again is problematic for woodblocks as they could expand in the process.
I also find that oil-based inks have a much more pleasing surface finish, which looks a lot more like semi-gloss paints. Water-based inks end up very dry and dull in comparison, as shown on Figure 13.
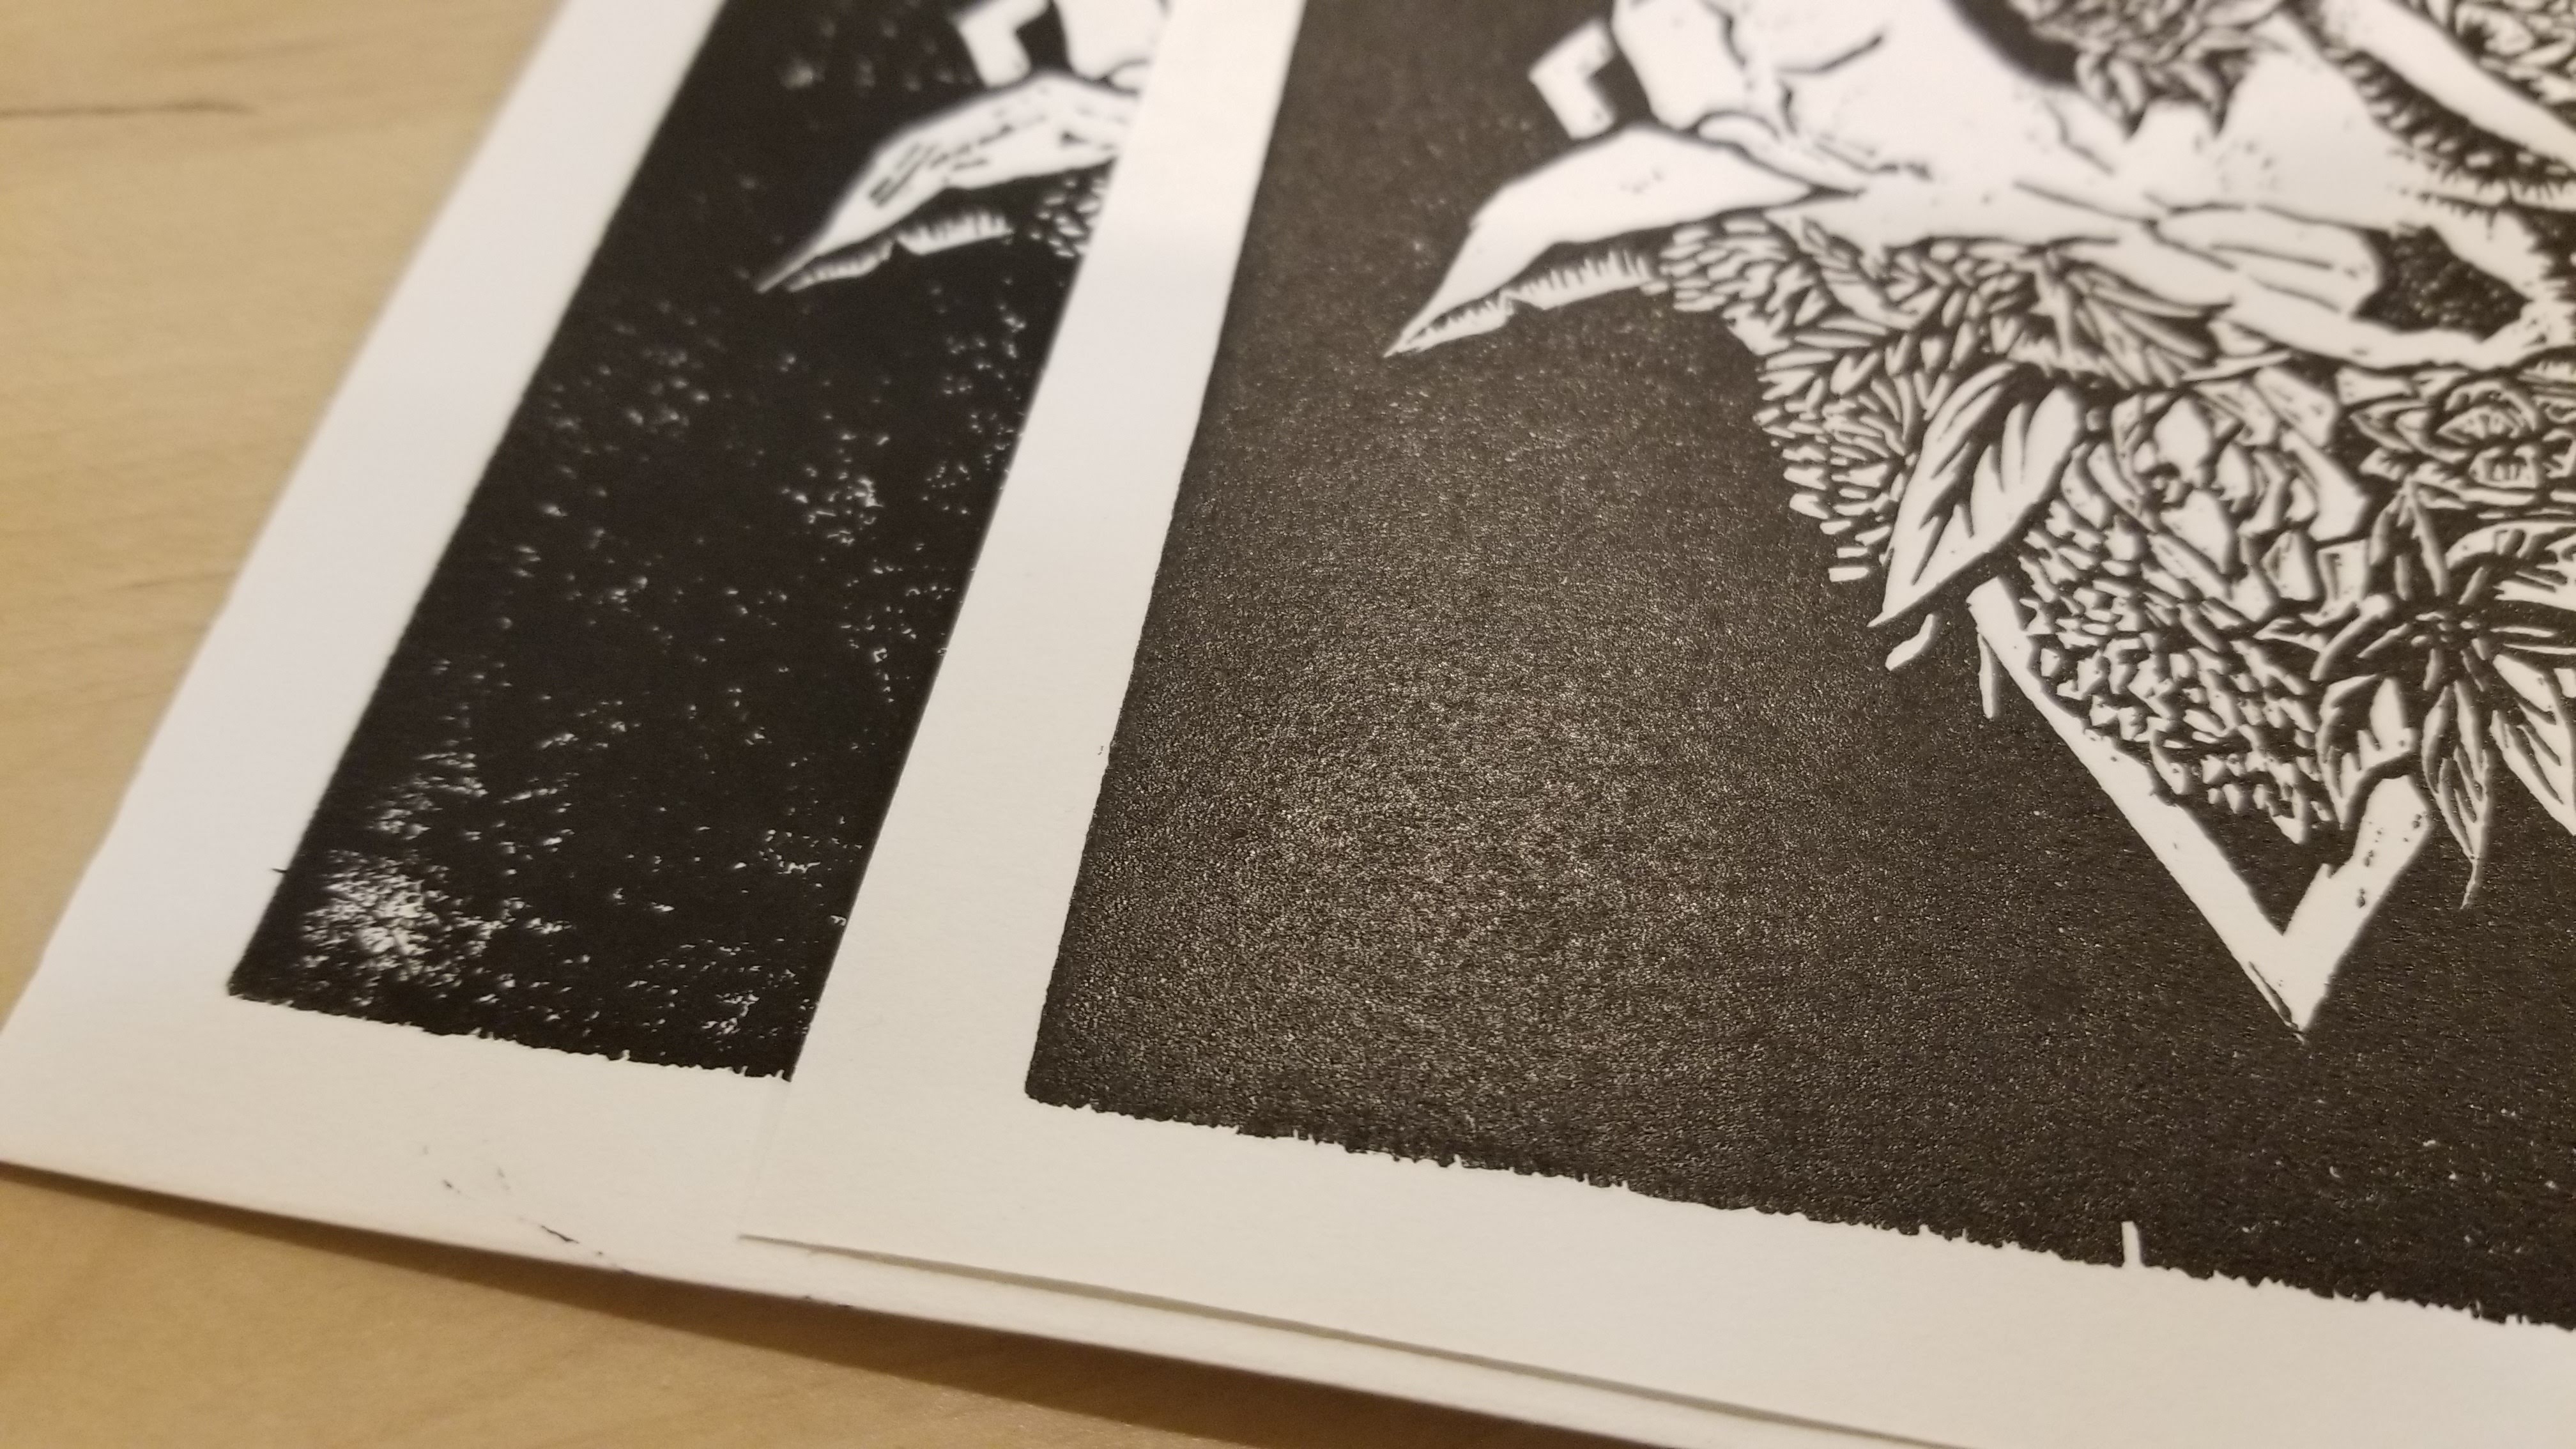
Figure 13: Surface finish of water-based ink (left) and oil-based ink (right).
Lino vs Woodblock
I’d also like to give a quick comparison between the detail achievable using lino and wood, shown on Figure 14. The lino block here has the exact same design as the woodblock, but I could not carve the same amount of detail onto it. The carve on the woodblock was very marginally larger than on the lino, but it was much easier to carve smaller detail on. While a lot of people suggest lino and water-based ink, I would highly suggest jumping straight to woodblock carving and using oil-based inks. It is simply much less frustrating and yields better results in my experience.
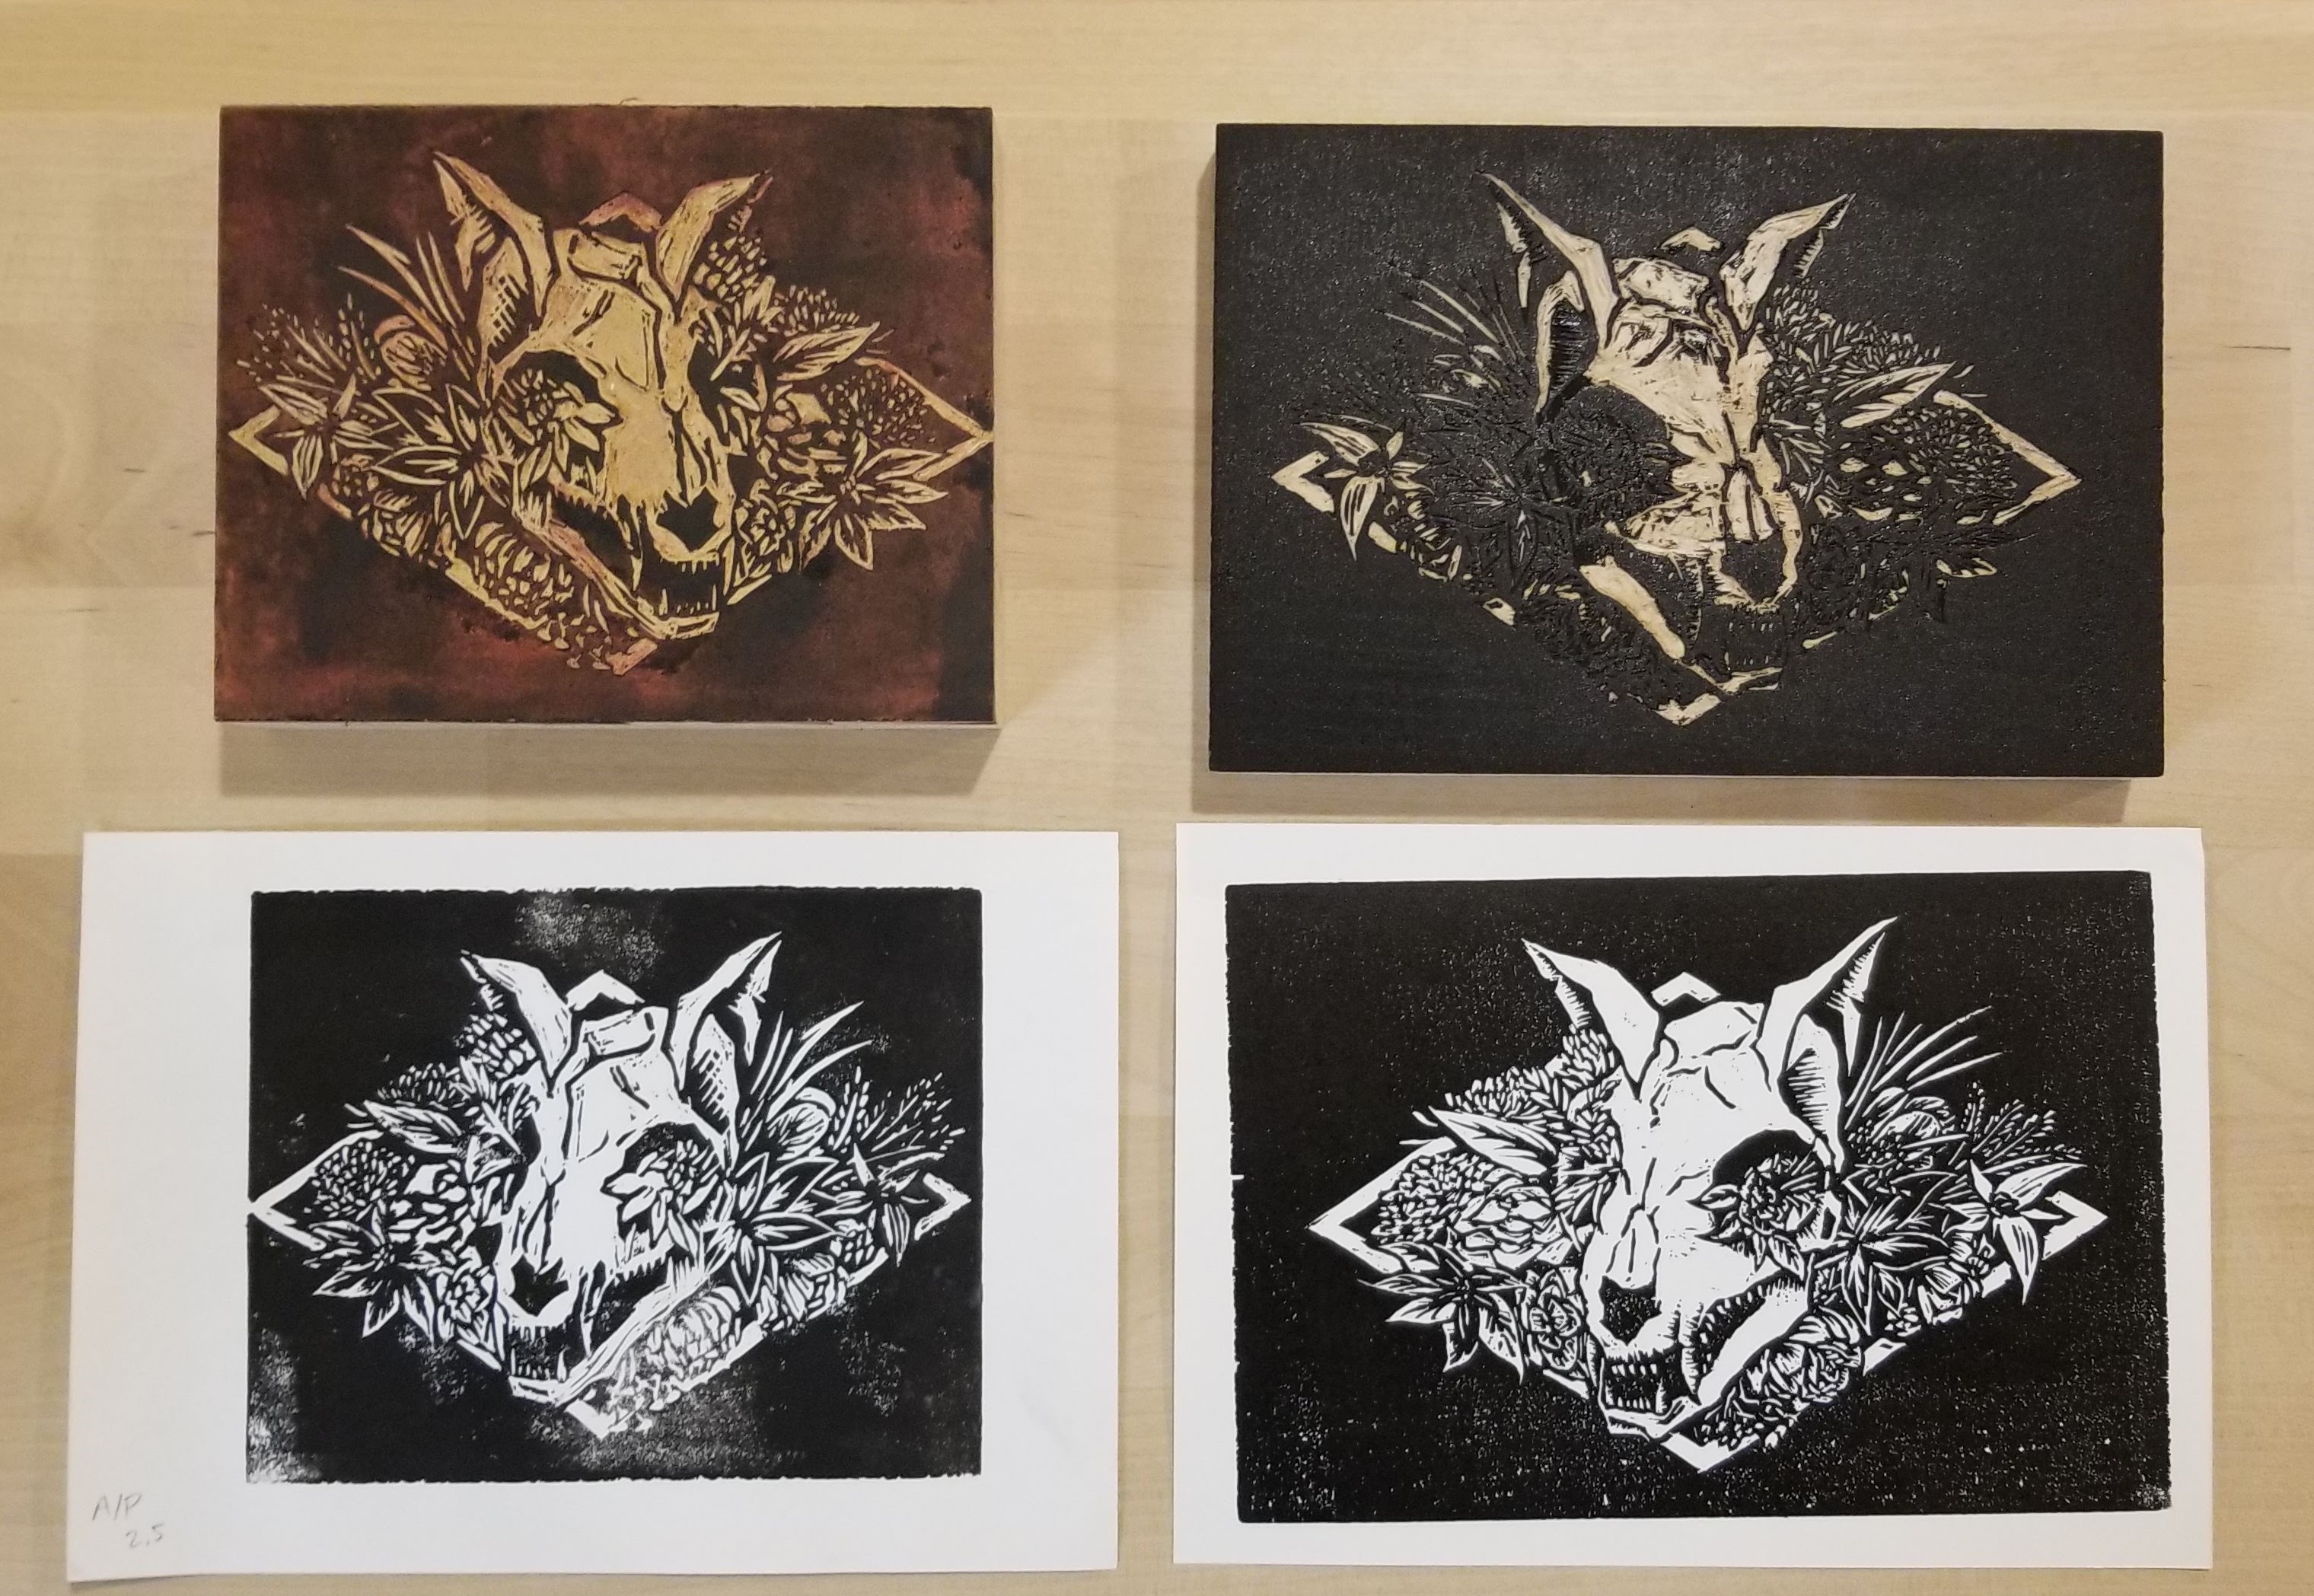
Figure 14: Comparing a print using a lino block (left) to a woodblock (right).