Executor Mask Prop Construction
So I’ve recently gotten hooked on the game Pathologic and really wanted to make the plague-doctor-style masks that the so-called “Executors” wear in the game. Here’s a quick and dirty build-log for what I did.
Creating the Base
First, I made a low-poly version of the mask model in Blender (Figure 1). The low-res model was then flattened into a foldable model using Pepakura Designer (Figure 2).
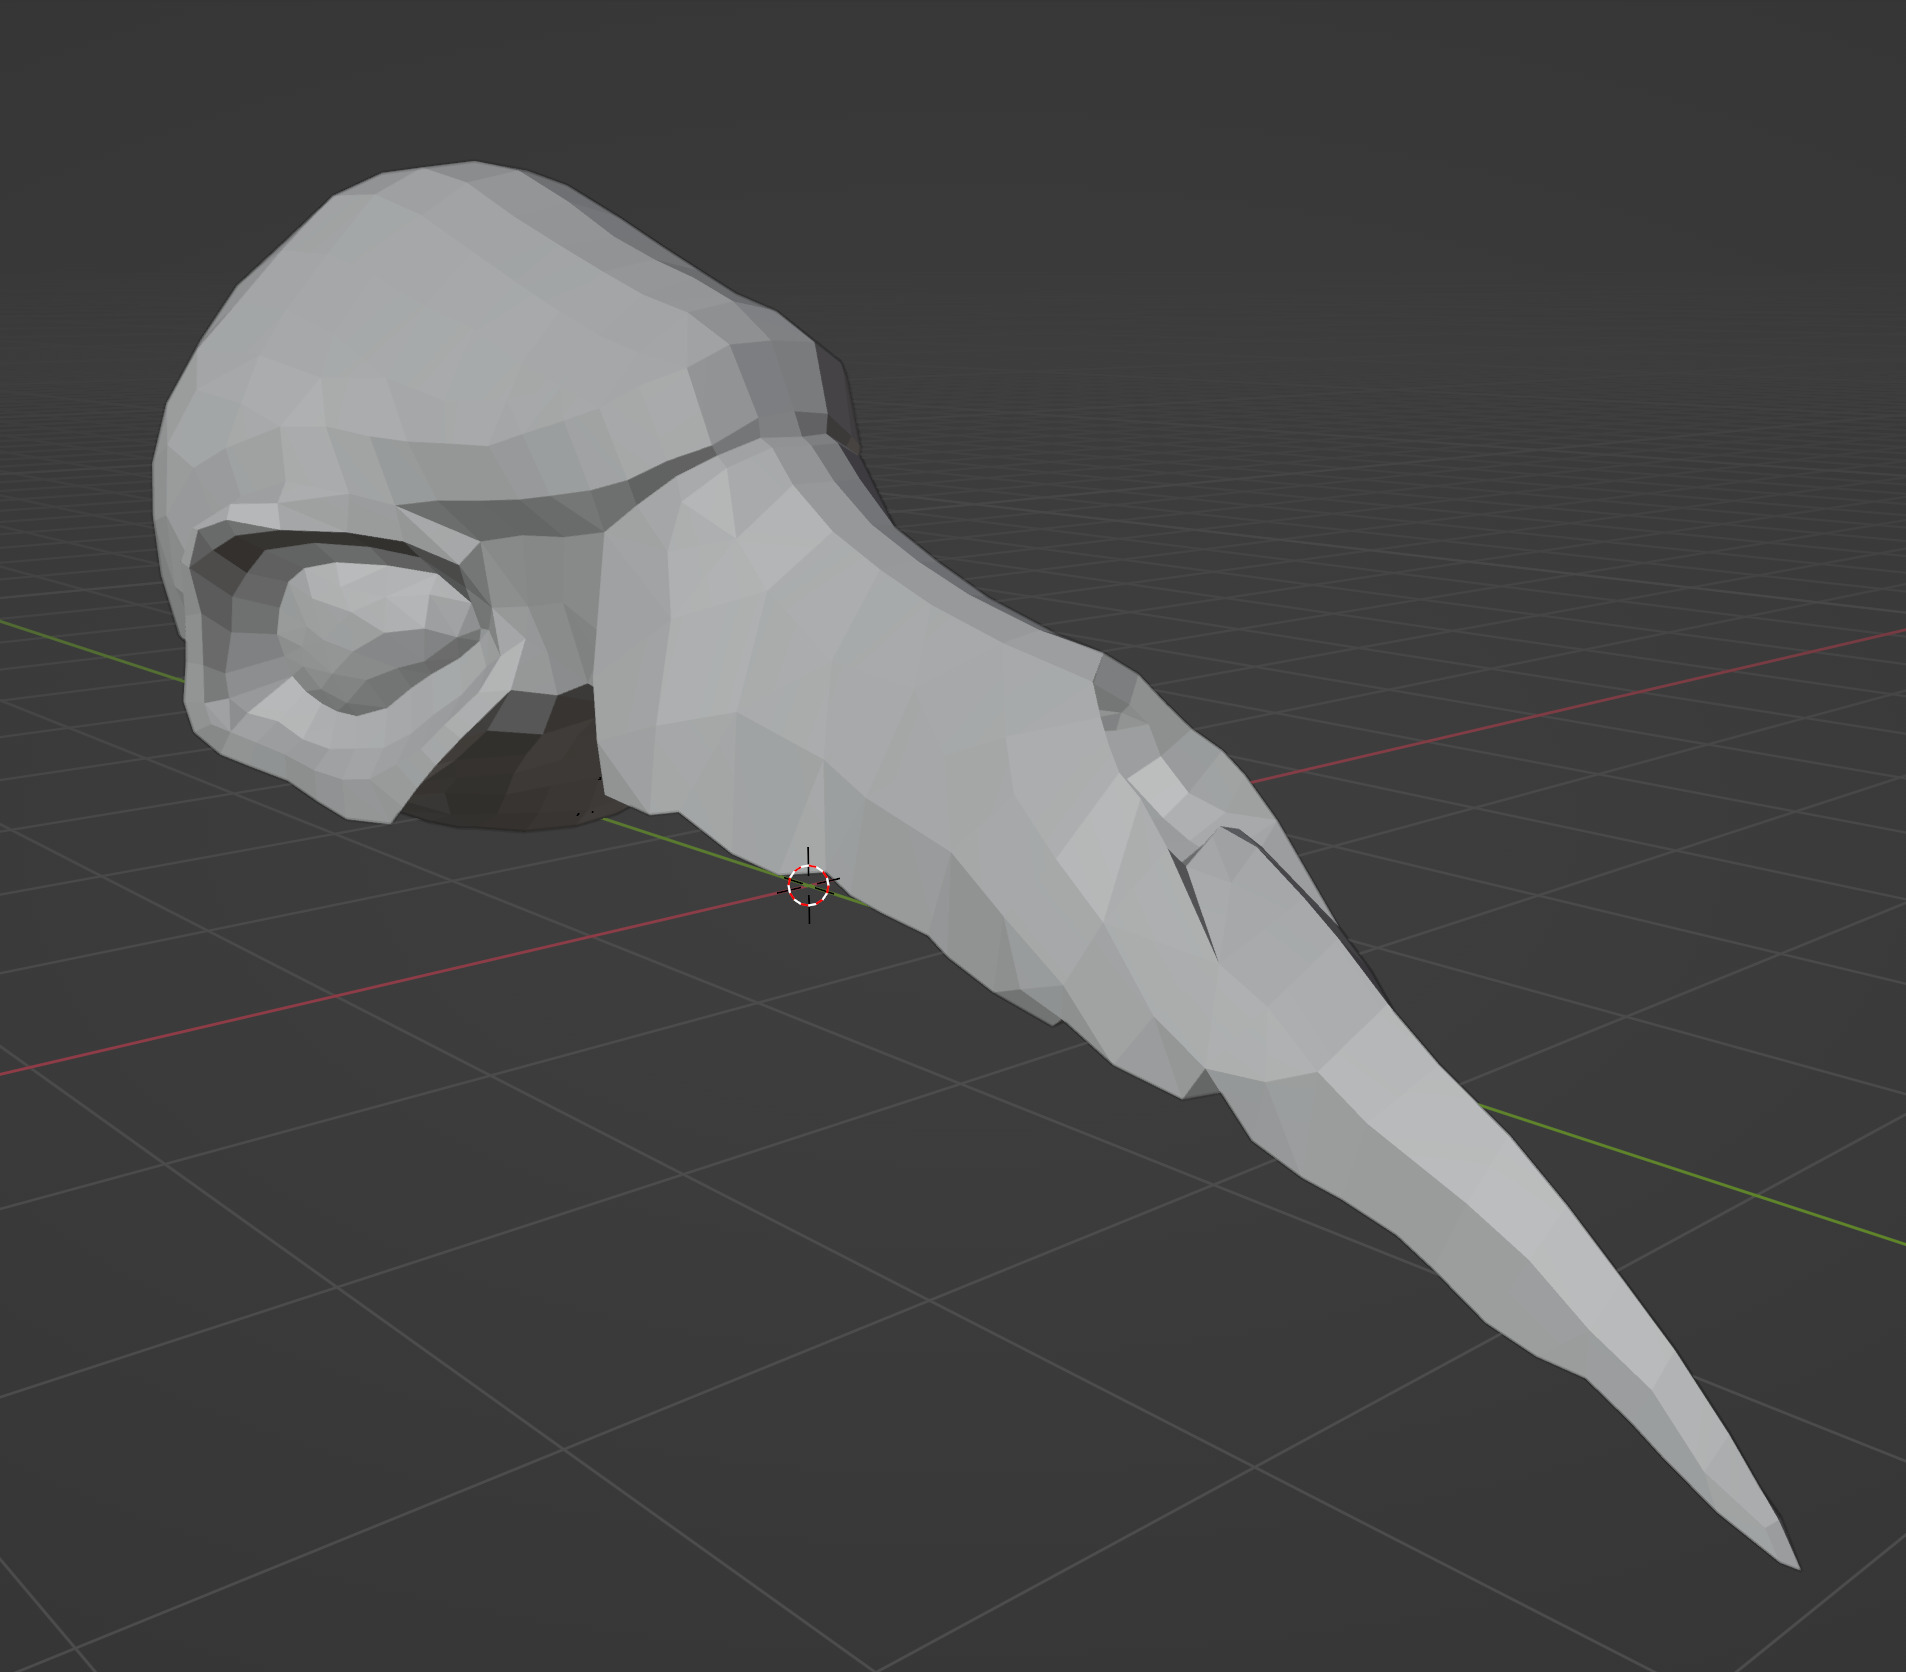
Figure 1: Low-poly model of the Executor mask in Blender.
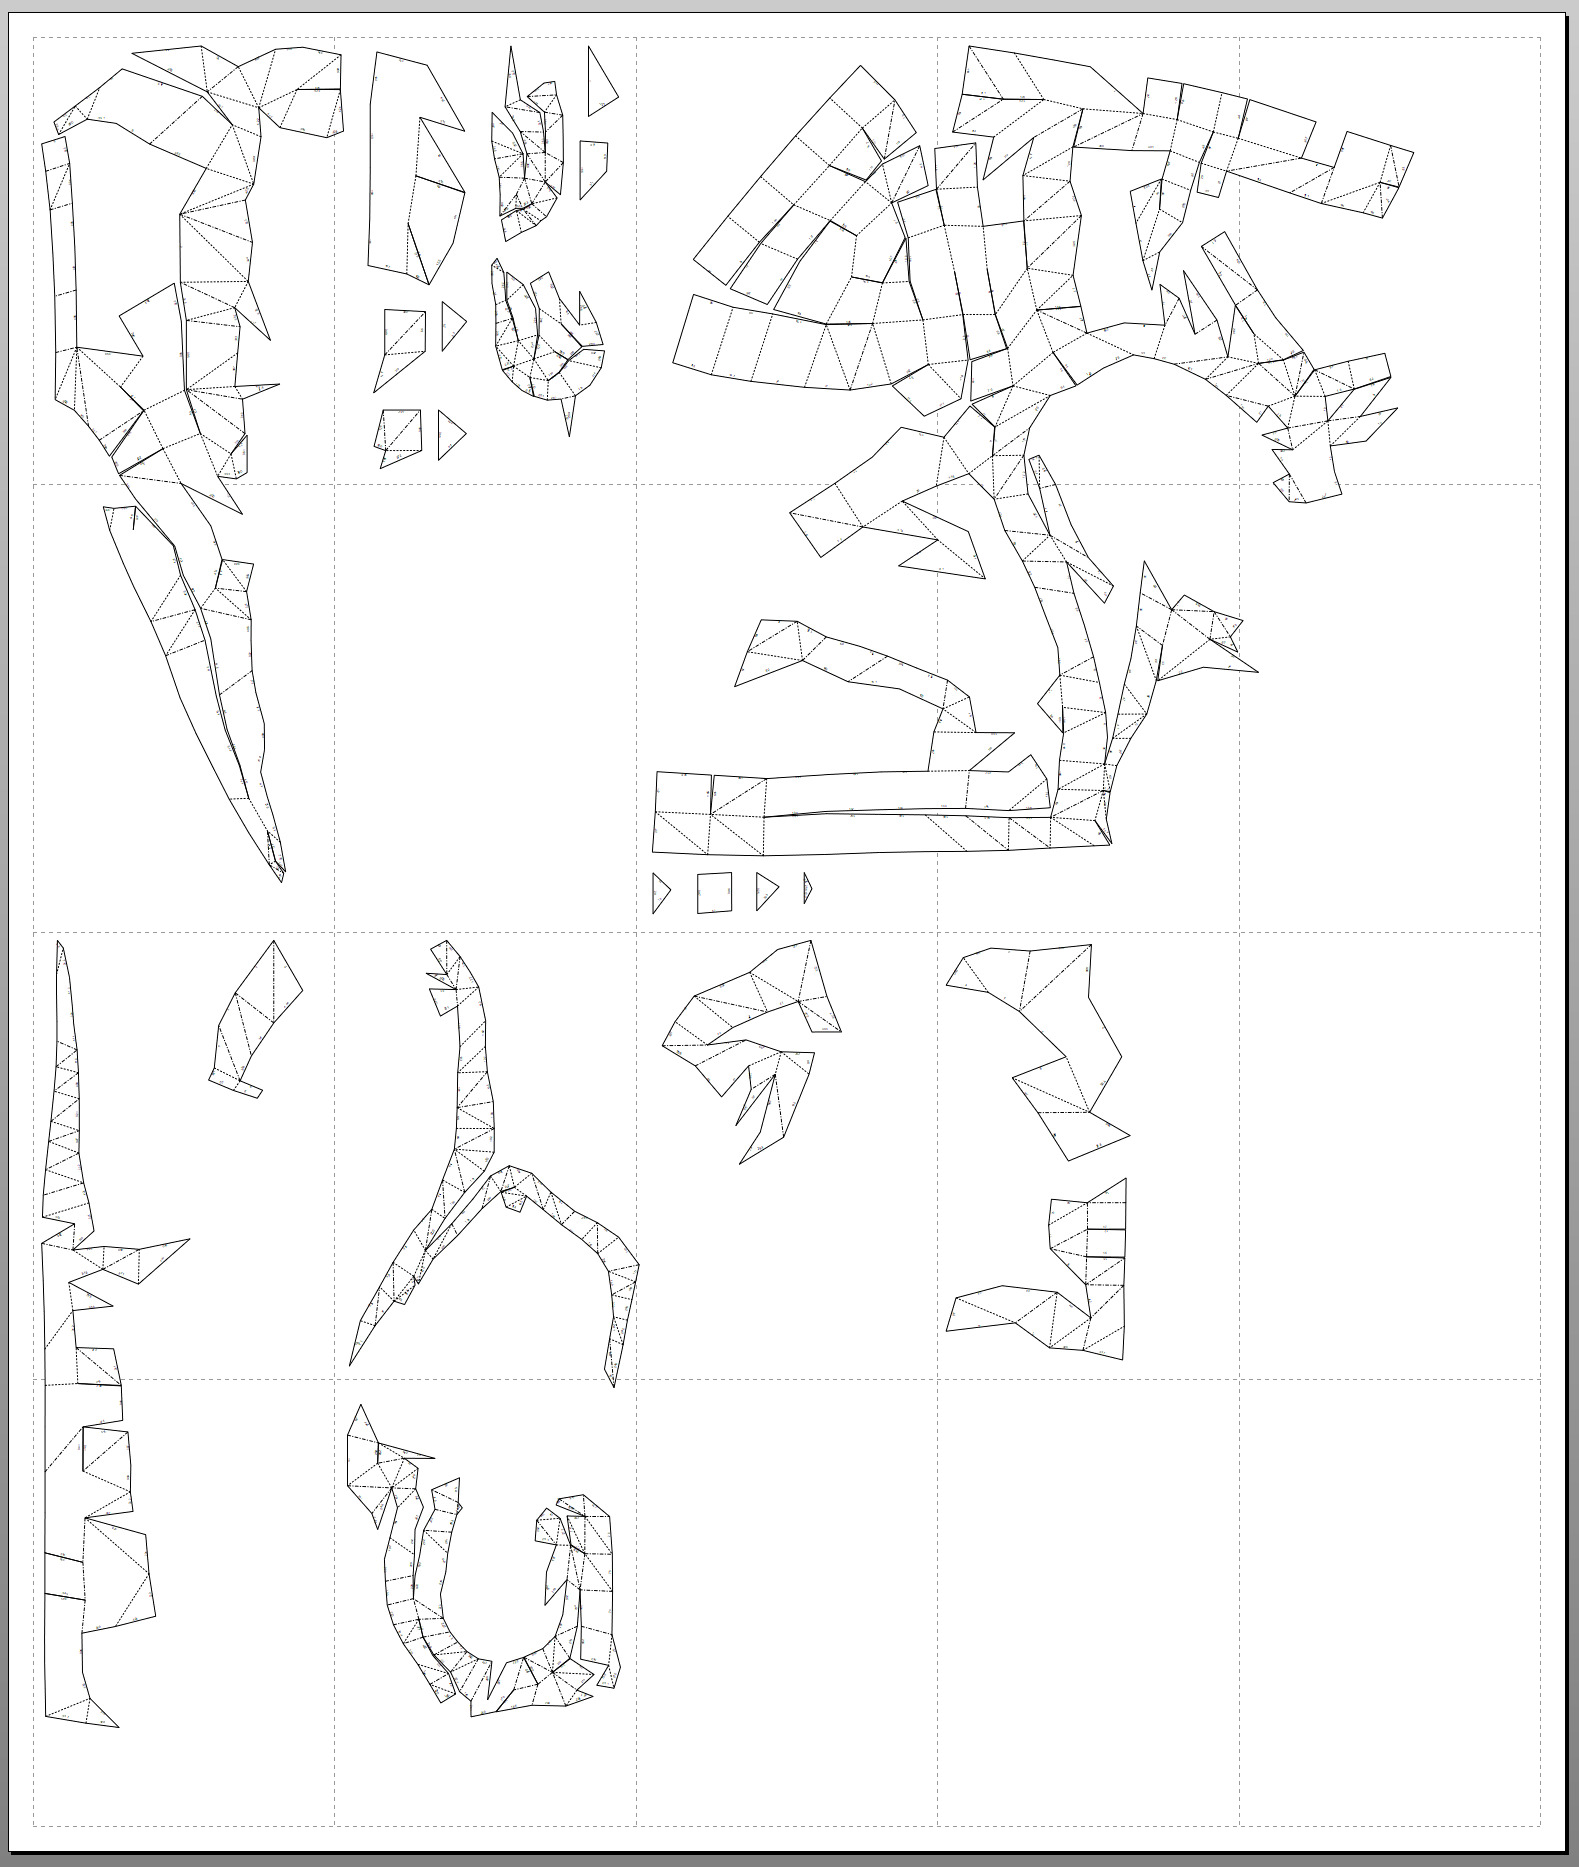
Figure 2: Unfolding of the low-poly model.
Doing it this way makes creating the base easier, since the low-poly flattened version can then be printed on cardstock and folded to construct the model. I actually just printed on normal letter-sized paper then pasted that onto a large sheet of poster-sized cardstock. The folded model can be seen on Figure 3.
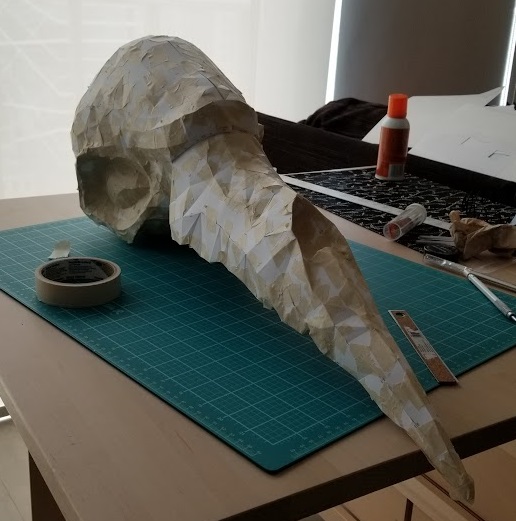
Figure 3: Folded low-poly paper model.
At this point, the model is fairly flimsy since it’s made of just cardstock kept together with masking tape. I wanted a super sturdy prop, so I cut up some fiberglass and stuck it on the inside with some fiberglass resin. Do note that this stuff is fairly nasty, even just cutting the fiberglass is probably not too good for your health so I did it all outside. The original plan was actually to keep the beak and the head separate to make it easier to store, and just have magnets connect the two pieces when needed, but I ended up just permanently joining the two pieces since the magnets didn’t seem to work out too well.
Anyway, with the fiberglass on the inside, the tape on the outside of the model can be removed, then the whole thing can be coated with a thin coat of resin just to make the surface hard.
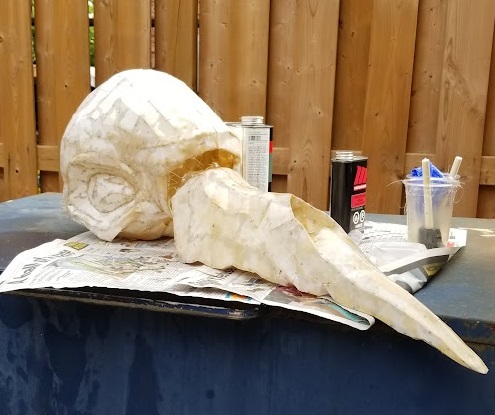
Figure 4: Lining the inside with fiberglass.
Modelling the Surface Details
With the base model done, we need to add in the surface details. I did this using foam clay, a material that is ostensibly moldable like clay, but sets to be a superlightweight foam. Note that although it’s called foam clay, it actually doesn’t really mold the same way normal clay does. It’s a lot more rubbery and bouncy than normal clay, so it doesn’t really hold a surface finish that well. This actually doesn’t end up being a problem since a lot of the surface finish ends up coming from the paint, luckily enough, so the clay is just there mostly for the grooves in the beak, scratches and pitting on the skull, and some veining around the eye sockets. I didn’t bother putting any clay on the eyes themselves, since I had plans to replace them with resin eyes.
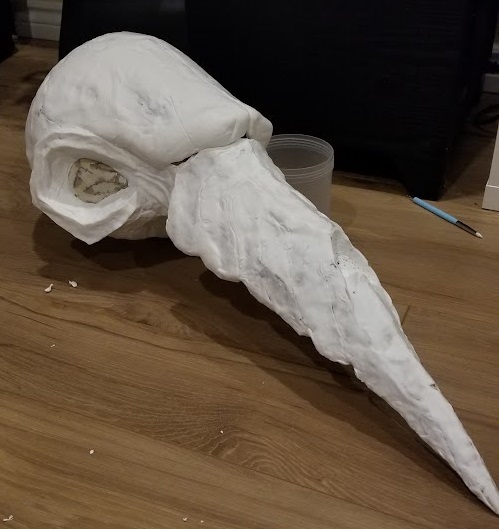
Figure 5: Finished model with foam clay details.
I then just let the clay air dry for at least two days (ended up being two weeks for me since I got distracted). With the foam clay set, it’s possible to add more details by sanding off the foam clay. I mostly just did this to deepen the grooves and scratches. Note that because the base was smooth from the resin, there’s a possibility for the clay to peel off the base if you’re not careful with the sanding. It’s not the end of the world if you do though, since the skull is supposed to have imperfections anyway. Sanding will also smooth out some inevitable unintended features from the clay, like finger marks. With all that done, we can finally prime the model. I used white plastidip for the primer, with the intention of waterproofing the foam clay, which degrades with water.
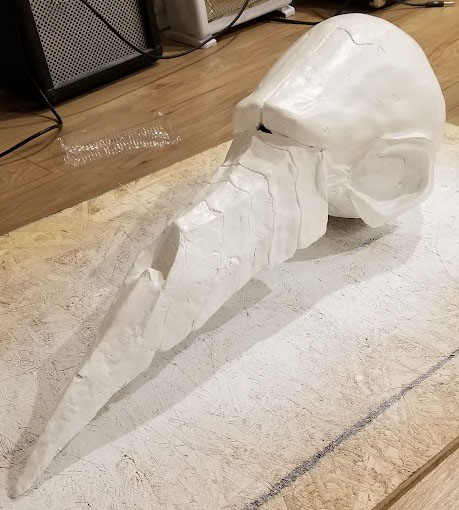
Figure 6: Finished model with foam clay details.
Painting
I don’t have any in-process pictures of painting since it was actually quite a fast and messy endevour. I painted the entire model using acrylics, with the plan being to just get a nice ivory colour on the entire skull, then paint on some black for the cracks. Basically, I mostly used a burnt sienna mixed with titanium white to get the ivory undercolour (I ended up really liking the little bit of warmth from the burnt sienna.)
Then I mostly used paynes grey as the base for the cracks. This part is actually a lot easier than it looks, since you can basically just wet brush on the dark paint, then wipe it off while it’s still wet. This means it’ll get stuck in whatever grooves exist in the model, mimicking weathering pretty well. You can then either wipe the high spots more vigorously to get down to the brighter white base coat, or dry brush on a thin layer of pure titanium white. I did this mostly by feel, so I’m not sure how to describe it.
I also did some shading in the veiny areas around the eyes, painting the top side of the veins a lighter grey colour and painting shadows underneath. This isn’t really realistic, but is mostly there to emphasize them (an effect similar to contouring makeup).
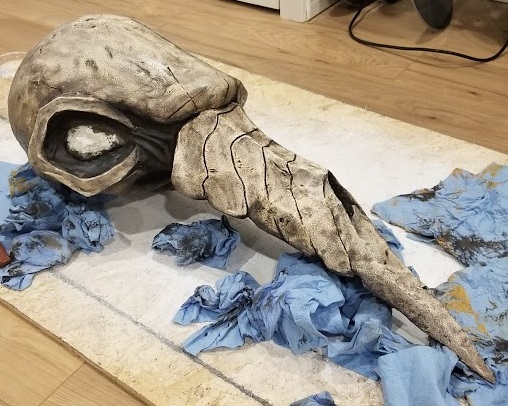
Figure 7: Painted model.
Eyes
I had this idea of making the eyes for the skull glow, though I wasn’t sure if I was actually gonna go through with it. Figured the skull was going nicely so may as well go all the way with the glowing eyes. To make the eyes, I made another folded model with just the eyes, but this time printed it on transparency. To fold the transparency nicely, I had to score every edge lightly with a knife, then taped up the model. Make sure here to put tape along every edge to make sure the entire thing is watertight.
Then, I had to open up a small hole in the eye model (preferrably on a fairly flat section on the back side), then pour a little bit of UV-curing resin tinted with some orange dye. The hole was taped up, then I went outside and kept turning the model while it cures in the sun. The point here is that we want to cure a thin layer of resin over the entire eye. When the model feels fairly solid and the resin was no longer flowing, I just left it in the sun for the rest of the day. Once it’s done curing, the transparency paper can then be peeled off. It should come off fairly easily since the resin wouldn’t stick on plastic.
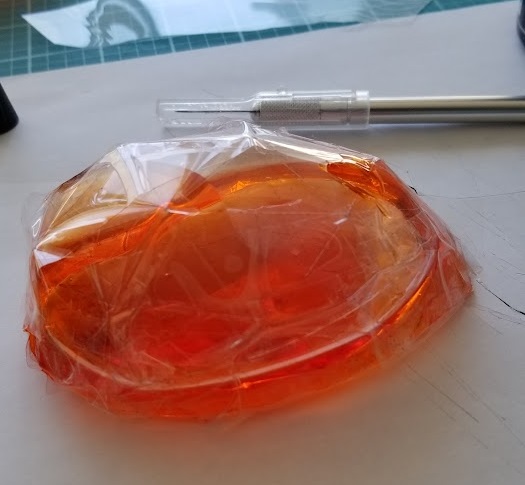
Figure 8: Creating the eyes with resin and transparency paper.
Once the eyes are done, I then just cut out the eyes on the original skull with a Dremel, then glued the new resin eyes on the inside of the skull. I guess I should note that the eye model I used to make the resin model actually extended a bit around the eye socket to give a surface to stick it on the inside. To get the glowing eyes effect, I just added some fairy lights to the inside cavity of the skull.
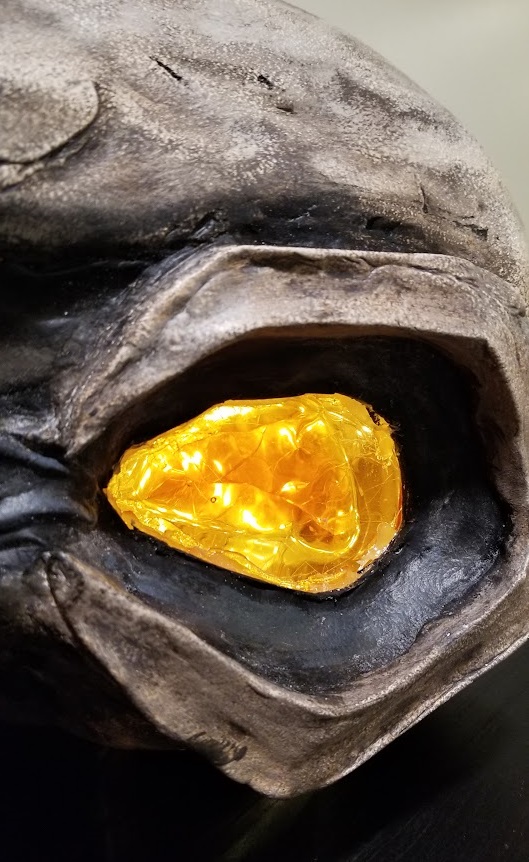
Figure 9: A closeup of the eyes with the fairy lights inside.
Completed Skull
Here’s some glamour shots of the completed skull.
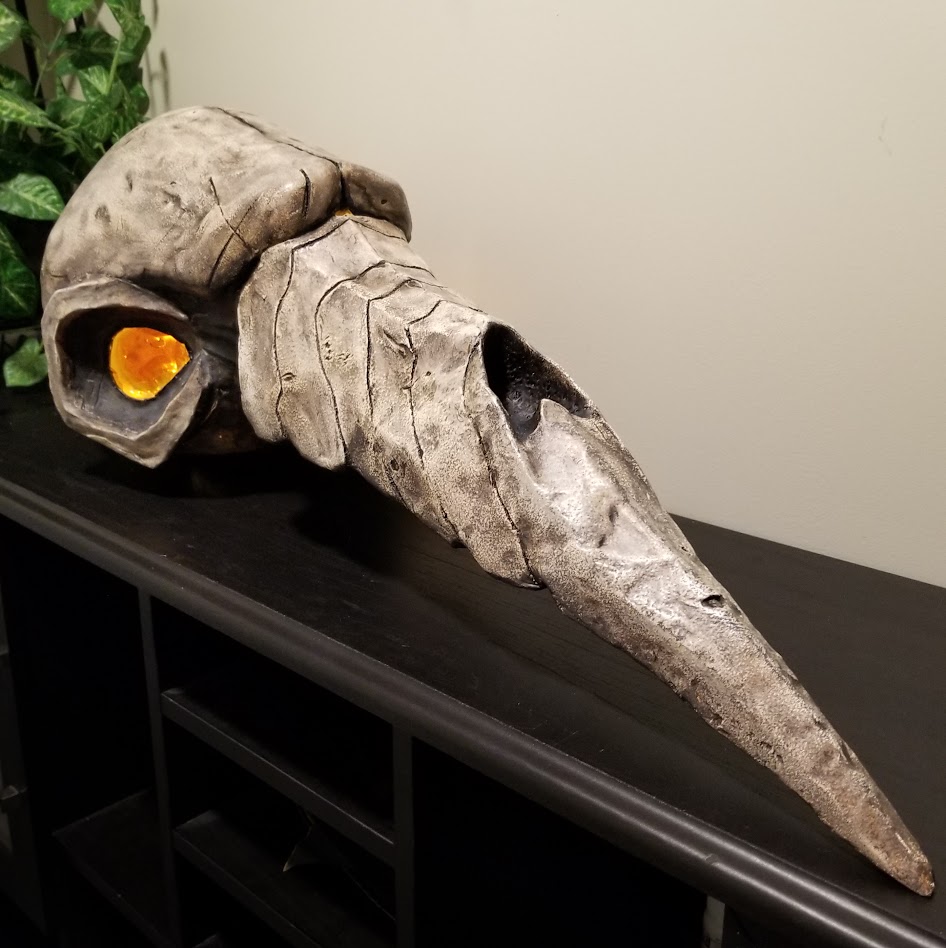
Figure 10: Completed Executor skull mask.

Figure 11: Skull with the eyes glowing.